5 Thanksgiving Crafts for Kids
by Karen & Grace Morris
Help us give thanks with our Thanksgiving crafts for kids. This is a time to remember others. And thank God for what that He has done for us (especially a plentiful harvest).
The people in the United States celebrate by getting together for a large meal. The main course is usually turkey. A favorite holiday activity is watching football on TV.
In the U.S. we also remember that the Pilgrims came to America and were helped by the Native Americans.
Many other countries also have a holiday that is similar.
Place Holders
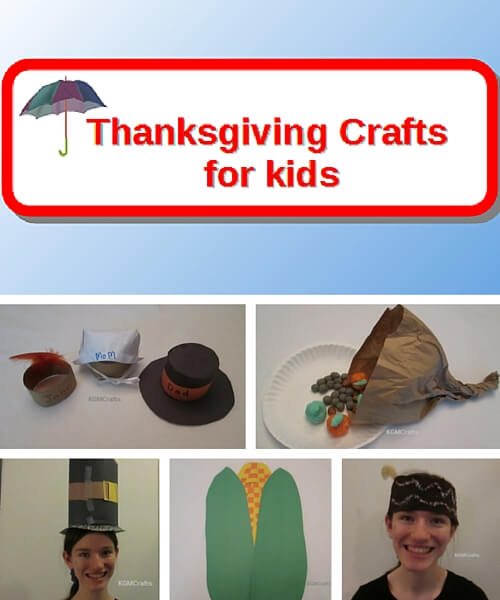
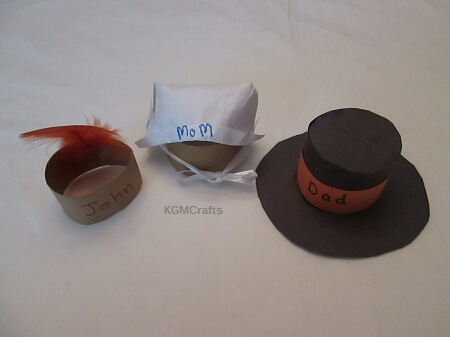
Each Thanksgiving place holder uses part of a toilet paper roll. You can make a Pilgrim hat for the men at your table. Place a bonnet where you want the women to sit. I thought that the children would like to have a Native American headdress.
Native American Headdress
This is the easiest of the table setting to make. Cut a half of an inch off of a toilet paper roll. Tape a craft feather to the inside. Write a name on the band. Place it where you want the child to sit.
Pilgrim Hat
We made our Pilgrim hats black, but according to history.com the men and women only wore black and white on Sunday. The rest of the week they wore white, brown, and green. Also buckles on shoes and hats did not become popular until the late seventeenth century.
Pilgrim Bonnet
You will need;
- A piece of toilet paper roll one inch wide
- A square of white paper three-half inches
- Two pieces of ribbon about five inches long
Fold the paper in half but don’t crease. Fold over each corner and tape. Fold up some on the cut edge to make a brim. Fold the back corners up.
Tape the ribbon to the inside of the hat. Write a name on the brim. Place the hat on the paper roll and tie the ribbon into a bow. Set where you want the person to sit at the table.
Woven Corn Decoration
Indian corn or flint corn is a popular fall decoration. It comes in many different colors such as red, white, and blue. Some is even multicolored.
You will need;
- green,
- orange,
- yellow construction paper.
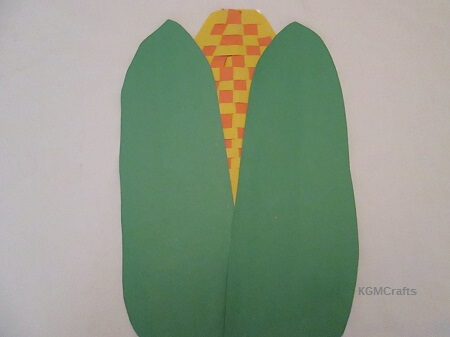
Cut an oval from the yellow paper. It should be twelve inches long. It is also six inches wide at the bottom edge.
Next cut two ovals from green paper the same length as the yellow paper. I made the green ovals narrower than the yellow. The green is about three and quarter inches wide at the bottom edge.
Next fold the yellow paper in half lengthwise. Cut slits from the fold to almost to the cut end. Do not cut all the way to the end. I made my slit about a quarter of an inch wide.
(The Native Americans showed the Pilgrims how to grow corn. They told us that the best time for planting corn is when the oak leaves is about the size a mouse’s ear. Then we were make mounds in the dirt putting about two to three seed of corn on top. Then we top the seeds with a dead fish and covered everything with soil.)
Next cut strips from the orange paper. Weave the orange strips through the yellow piece. Because the corn is an oval when you get near the top you may need to cut the orange strip so that it fits better.
Now take the two green pieces and place them over the yellow corn at an angle. You want your picture to look like you peeled the husk off part way to reveal the yellow corn.
Cornucopia or the Horn of Plenty
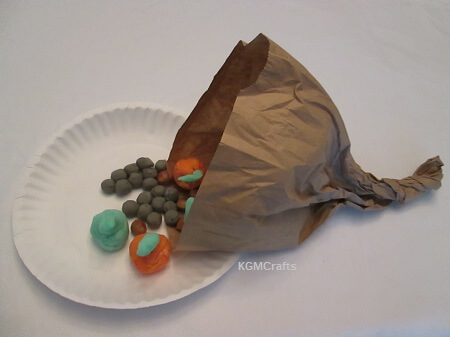
A cornucopia is a symbol of a bountiful harvest. It is a horn shaped container filled with fruit, nuts, and small pumpkins
You will need;
- Brown lunch bag
- Play dough
Open your bag. Now take a corner of the bottom and start twisting. Twist about half of the bag. Now open the opening so that it looks like a bowl.
Now make fall fruit and vegetables out of play dough. I used a homemade recipe. If you need a recipe you can find one here. Place your fruit and vegetables tumbling out of the bowl part.
The next two Thanksgiving crafts for kids you will be able to use in your pretend play.
A Wearable Pilgrim Hat
Pilgrim hats were good at keeping the sun off your head when traveling. Here’s one that your child can make to dress up for Thanksgiving.
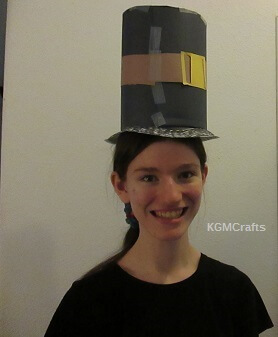
Supplies;
- A paper plate
- Three pieces of black paper
- One piece of brown paper
- One piece of yellow paper
- Black marker
- Glue stick
- Tape
Make a hole in the center of your plate. Cut out the center, leaving only about one and a fourth inches of your rim. Color the rim black with your marker.
Fold a half inch of your black paper. Wrap it around the inside part of you rim, having the folded part so that you can tape it to the rim. Do the same with the other piece. Tape the two pieces together.
Cut two pieces of brown paper each eleven by two-quarter inches. Cut a square piece of yellow paper, you need to have in bigger than the brown pieces of paper but not by too much. Cut two slits on both sides in the yellow piece of paper so that the brown paper can fit into it. Slide it on one of the brown pieces of paper.
Cut out two small pieces of yellow paper two-half by quarter inches. Glue on the sides of the yellow paper. Now your hat has a buckle.
Tape your brown pieces of paper on the black. You will want the buckle on the side of the hat.
Take your hat and put it upside down on another piece of black paper. With a pencil trace the top part of the hat. Cut the circle out and tape to the top of the hat.
Your hat is now done! Pretend you are on the Mayflower going to the new world!
Native American Headdress
The Wampanoag people wore a beaded headdress with a feather or two. You can read more facts about the Wampanoag here.
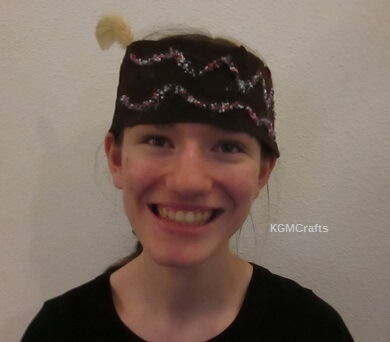
Materials you will need;
- Brown craft felt
- Brown thread
- Needle
- Feather
- Seed beads
- Hot glue gun
Measure your kid’s head so that they know how big to make it. For me I had to cut out two pieces going lengthwise out of a nine by twelve inch piece of felt. I also made it two and a half inches wide. Sew your piece together so that it makes a band. I sewed mine to the edged so that the pieces still fitted around my head.
Hot glue the father in the inside of your headdress, so that it sticks up. Make a design with seed bead. Glue to the front of your headdress. You can do the back if you want but make sure that the front is dry first (otherwise it will make a mess).
Gently shake off any excess beads that are lose and not glued. You might even need to add more hot glue and beads.
“Oh give thanks to the Lord, for He is good, for His steadfast love endures forever!” Psalm 107:1 ESV
We hope that your children had enjoyed our Thanksgiving crafts for kids. Happy Thanksgiving!
