Puppet Crafts for Kids
by Karen & Grace Morris
We love puppet crafts for kids! They are fun and educational. You can use many different materials such as felt, paper, craft foam, Popsicle sticks, paper bags, and even socks.
Let us show you how you can make some for yourself. We will focus on making animals, but you can make any creature you want. Let your imagination soar.
Popsicle Stick Puppets
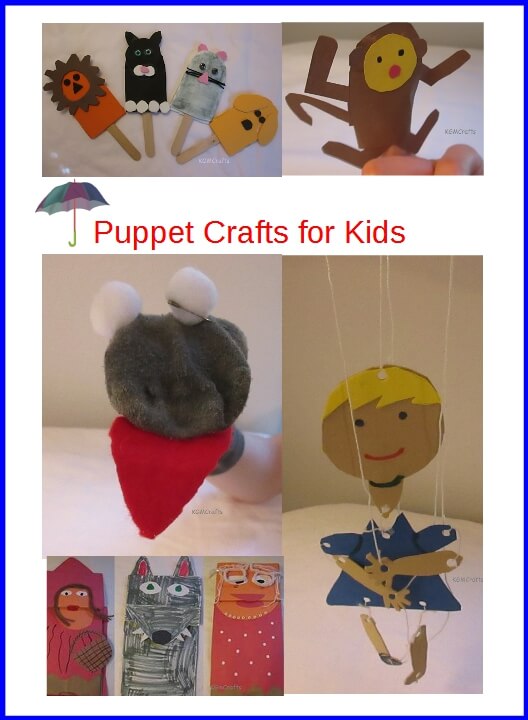
When I started this project I wanted a finger puppet made of craft foam. I thought that the glue wouldn’t hold the foam together after repeatedly putting it on your finger and taking it off. So I attached it to a Popsicle stick. You can still use it as a finger puppet if you want too. The puppet reminds me of a fudge sickle.
The first one I made was a dog the complete instructions are on this page. Here is a shorter version. You can use the same idea to make any animal, people, or even space aliens.
You will need craft foam, glue, and a Popsicle stick. Depending on the animal that you make you might want some beads, colored craft string, or yarn.
Cut two pieces of craft foam. I used my finger as a pattern. This is the body. Then think about how you want your animal to look. My cat has pointy ears, a white muzzle, a pink nose, and white feet. I glued on green beads for eyes.
I had to use a gray marker for the mouse because I didn’t have gray foam. I made pink ears and glued on black beads for eyes.
I used white glue when I made the cat. It worked, but it is harder to use. If I move the cat the eyes or other parts would slip. I did not have as many problems with tacky glue. It is advisable to leave your puppet overnight before you put in the Popsicle stick so that the glue has plenty of time to dry.
Now if you make all three of the puppets the dog can chase the cat and the cat can chase the mouse.
Or make African animals such as; hyenas, tigers, or monkeys! I made a lion out of orange, brown and black foam.
Felt Puppet Crafts for Kids
This project is for older kids. You will be doing some hand sewing or using a sewing machine.
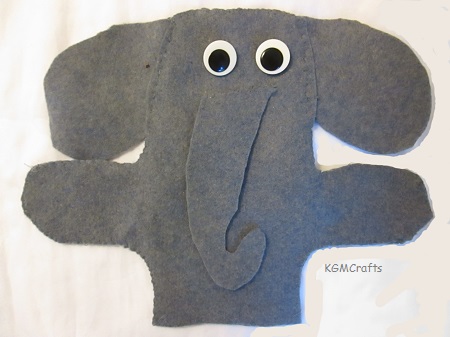
You will two pieces of nine-by-twelve-inch felt, a sewing needle, thread and two buttons or sew on wiggly eyes. To make the puppet I made a pattern by drawing around my hand on a piece of paper. When I got to the side opposite my thumb I drew another thumb. Use the pattern cut out two pieces of felt.
Make ears and nose. Sew eyes, nose, and mouth to the front of your animal. Place ears between the two pieces of felt. Pin the pieces together. I used a whip stitch to secure the outside edges. When I got to the ears I did a running stitch over through the three pieces.
I made an elephant (“I see an elephant fly”) but you could use the same procedure to make any animal that you want. You could make a tiger, a frog, or an alligator!
Finger Puppets
I have seen animal finger puppets crochet and made with felt. My felt pile was low that I needed to use another material. I choose construction paper.
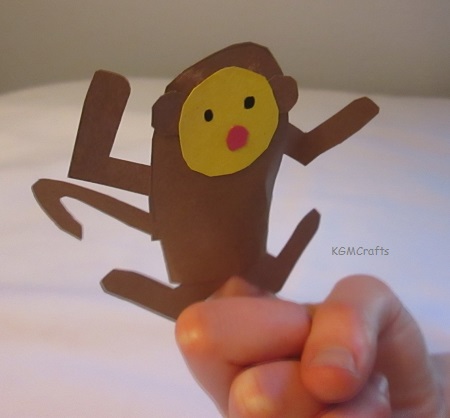
For this project, all you will need is construction paper, glue, and tape. How easy is that?
Cut a rounded rectangle with a tail. Add animal features. I made a monkey, so I used brown paper for the body. I cut “l” shapes for the arms and legs, circles for the ears, a curved piece for a tail. With a lighter brown I cut a circle for a face. I then made eyes and a mouth. Glue everything together. I used tape to secure the piece that goes around your finger. Make ten and you can sing “Ten Little Monkeys Jumping on the Bed.”
Paper Bag Puppets
When my children were young I used 1, 2, 3 Read by Rebecca Avery teach them how to read. One of the ways that the program uses to teach phonics is to have your child make an animal puppet. The student book has the templates to make the animals.
Another fun educational project is to make characters from your favorite stories. I made the characters from Little Red Riding Hood.
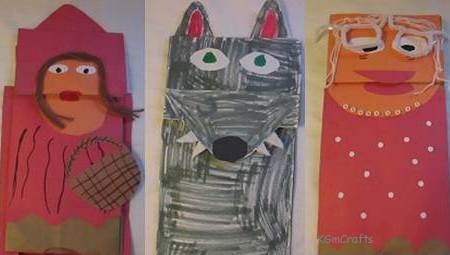
Little Red Riding Hood
You will need plenty of red paper to make this little girl. Well, I suppose you could use blue but who ever heard of the “Little Blue Riding Hood”?
- You will also need scraps of brown, orange, and white
- Brown yarn or another color for the hair
- Red, brown, and black markers
Leave your paper bag folded. To make a face cut a half circle out of orange for the flap and a half oval for under the flap. Make the pieces small enough that there is about a one-inch border on the bag for the red cape. In the story
Red Riding Hood was bringing food to her grandma, so cut a basket out of brown paper.
Cover the front of the bag with red construction paper. The hood is a rounded triangle.
Make a face with white paper for eyes, makers for pupils and lips, and six pieces of brown yarn for hair.
I taped on an optional piece of red paper for the back of the cape.
The Big Bad Wolf
In most of the story versions, he was a scary creature. He eats the grandmother and wants to eat the girl. You can also use the wolf puppet in other stories like The Three Little Pigs.
You will need white, red, and black paper. You will also need a gray, pink, and green marker.
The Big Bad Wolf is to look… well big and bad, so cover the flap and front of the bag with white paper. Make a rounded triangle for the snout also cut a triangle for ears. Now color your wolf gray. Make a black nose, red tongue, and white eyes and teeth. Color the center of the eyes green and the center of the ears pink. (“My grandma, what big eyes you have!”)
Grandma
For the grandma, you will need;
- Orange, red, white paper
- White pony beads
- White yarn
- Two white pipe cleaners
In the story, the grandma was old and sickly, cover the flap with orange paper. Make a half circle out of orange and place under the flap. Make red lips out of paper.
Glue on eyes and color in black pupils. Glue on six pieces of yarn for hair.
Make glasses by bending pipe cleaners then tape it on the bag.
Glue white beads around the bottom of the orange paper. Cut a piece of red paper to fit below the orange piece. Make white circles with a hole punch and glue to the red dress.
Using String
Instead of making an animal I made a girl. You will need craft foam and markers in your choice of colors. You will also need string, two Popsicle sticks, tacky glue, and the template that you can download.
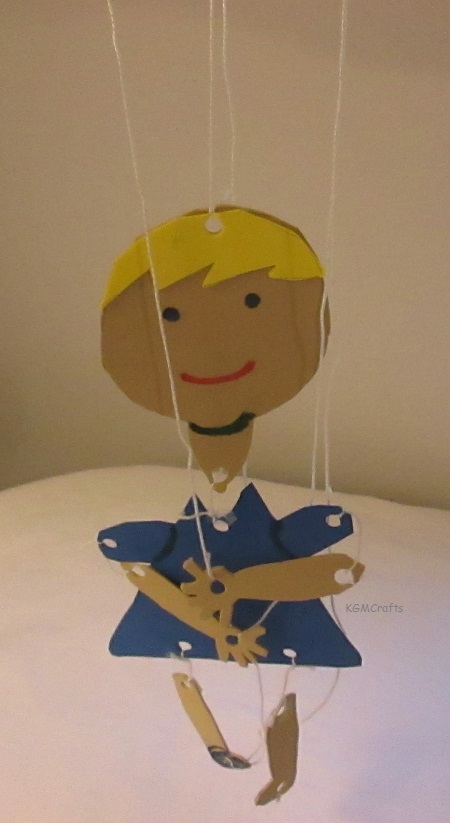
Lay the two Popsicle sticks together so that they cross in the middle. Glue the center.
Following the lines, cut the shapes out. Trace the shapes on craft foam and cut out. With tacking glue, glue the hair (the zigzag piece) on the head. Using the cutout from the template as a guide, punch holes into the different pieces. Be careful not to get too close to the edges.
Cut five pieces of string each about three-inches long and tie the neck to the end of the dress, the arms to the sleeves, and the legs to the bottom of the dress.
Next you need to connect the Popsicle sticks to the puppet with string so that you can control it. First connect the head. Cut one long piece of string tie one end to the hole in the head. Tie the string to the center of the Popsicle sticks.
Cut another piece of string and attach it to the hole in the hand. Wrap the other end of the string around an end of a Popsicle stick. Do the same for the other hand.
Do the legs the same way as the hands. When you are finished, have your puppet do patty-cake.
Socks
Are your socks mix-matched? Your kids can make puppets. All you will need is some extra supplies. I used pompoms and red felt. A great idea is to give your kids an assortment of socks, yarn, felt, pompoms and other items. Let them make snakes, lizards, aliens, and other creatures.
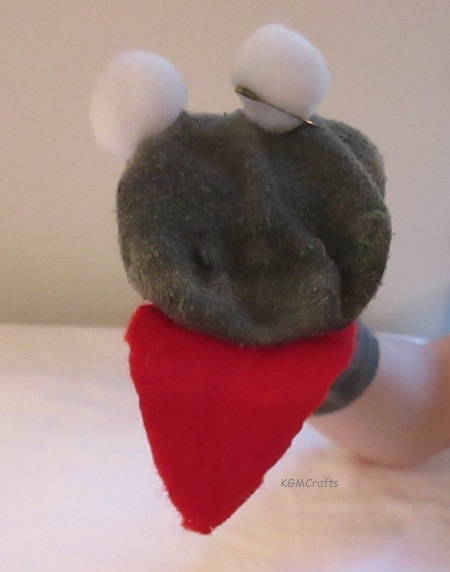
For my snake I used a faded green sock, red felt, and white pompoms. I used safety pins to attach the felt and pompoms. You could sew the items on if you want too.
We have created several puppets crafts for kids that will keep your child busy on rainy days. Be sure to put on a show.
