Halloween Crafts for Kids
The Not So Scary Kind
by Karen & Grace Morris
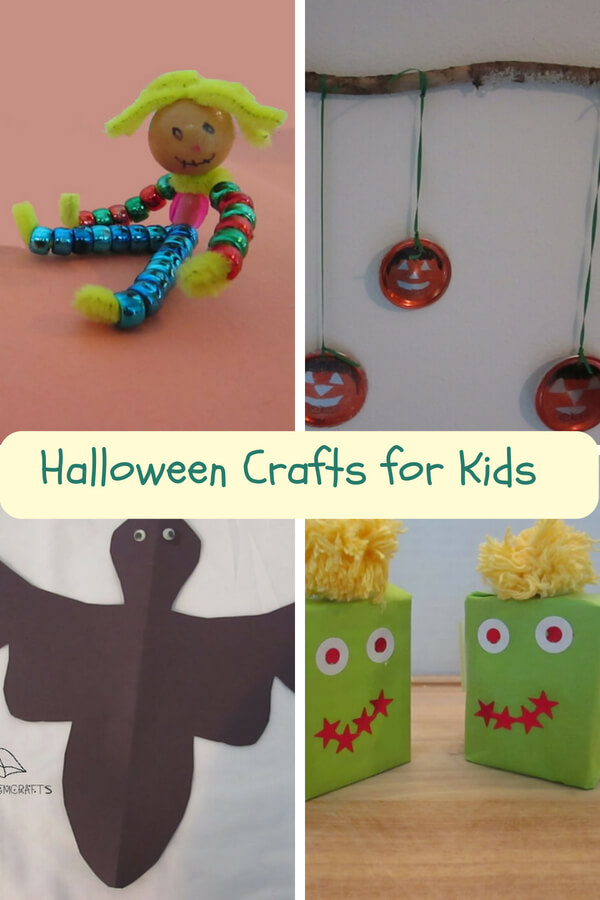
We have some fun Halloween crafts for kids for you. Nothing is too scary. So come make a bat, cat, scarecrow, or Jack-O-Lantern decorations. Or make a buggy treat bag. (Don’t worry these bugs taste great!).
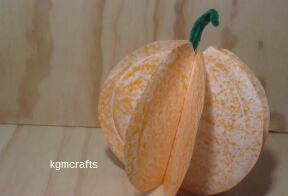
The pictures will take you to the individual Halloween crafts for kids.
Click the pictures for yummy Halloween crafts for kids.
Time for
Trick or Treat
Time to
Decorate
Your Home with
Halloween Crafts for Kids
Jack-o-Lantern Sun Catchers
These Halloween crafts for kids will brighten your day!
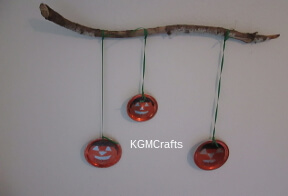
Jar Lid Jack
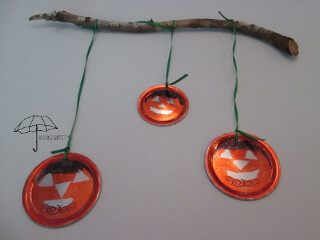
How bright is the light.
you will need;
- Canning lids I used two wide mouth and one regular
- Orange and black permanent marker
- Sticky labels
- Green ribbon
- Stick
- Hammer and nail to make hole in the jar lids
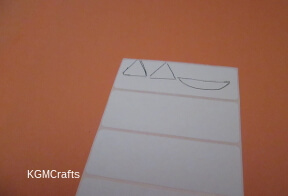
Draw your facial features on the sticky labels. I just used triangles for eyes and a half circle for a mouth.
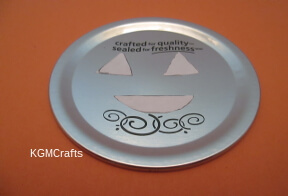
On the outside of the jar lid there is usually writing and black swirls. Place the eye stickers just below the writing and the mouth sticker just above the swirls. If you peel the sticker before cutting, it will peel better.
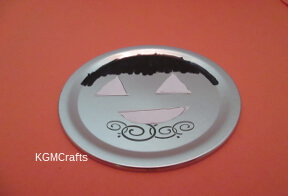
Draw hair with a black marker over the writing.
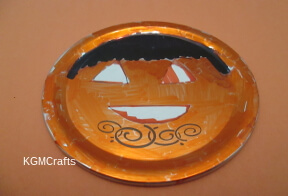
Next color your pumpkin orange.
Remove the stickers that you used for the eyes and mouth. Your pumpkin will now look like a Jack-o-Lantern!
On one of the pumpkins I placed the eyes where I did not want it. Instead of using a new jar lid I found out that rubbing alcohol will remove the mistake. Dip a cotton swab in alcohol for small mistakes.
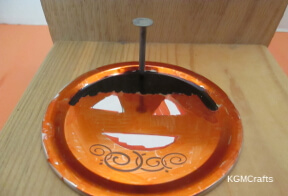
To hang the jar lids you will need to make a small hole using a hammer and nail. Place the lid on a piece of wood before you hammer in the nail.
Then thread the ribbon through the hole. Tie the ribbon to the stick and your decoration is complete.
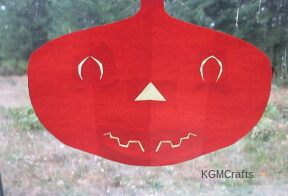
Catch the Sun with Jack
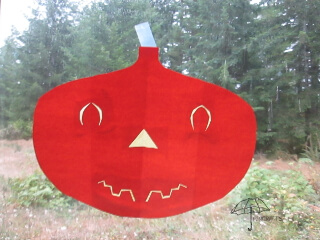
Jack who? Jack-O-Lantern that's who.
Supplies;
- Orange construction paper
- Scissors
- Yellow tissue paper
- Glue stick
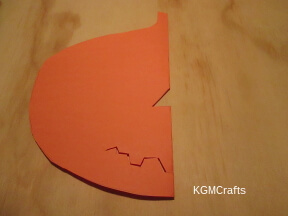
Fold the construction paper in half. At the fold cut a small rectangle. Cut around the side so that it looks like half of a pumpkin.
At the center cut out a mouth and nose. Trim a little from the mouth so that there is more of an opening.
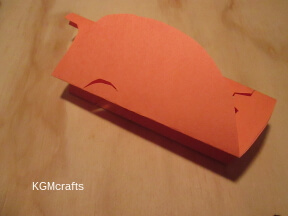
Fold the sides to the center. On each fold cut out the eyes. You can either make triangles or another shape such as a c. If you want to make a c don't cut all the way to fold. When you unfold the paper you will have a round shape for each eye. You may want to trim some so there is more open space.
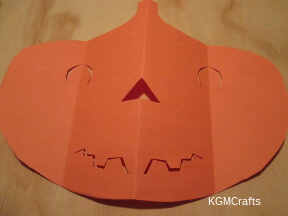
Unfold the paper.
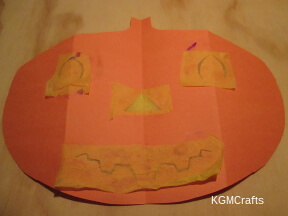
Lay the pumpkin flat and place pieces of tissue paper under the eyes, nose, and mouth. When you hang the Jack-O-Lantern near a window it will look like there is a light inside.
Scaredy-Cat
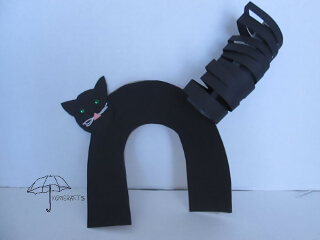
It is scary out tonight! Black cats make great Halloween crafts for kids decorations.
Supplies;
- Black paper
- Green sequins
- White craft string
- Thin cardboard
- Tape
- Glue
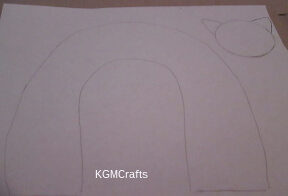
First make a pattern on white paper so that you can see what you are doing. On your paper draw a “C” shape (when cats get scared they arch their backs. That is why we are making a “C” shape). My “C” was about 2 inches wide. The “legs” are 5 inches high.
Then draw a cat face. Use a three ounce drinking cup for your pattern. On the top draw two triangles for ears. Cut out the cat’s head and body out.
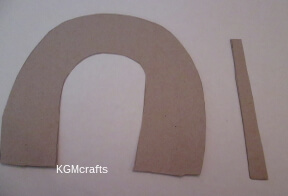
You will also want to cut the “C” shape out of thin cardboard. I used a cereal box. You will also need a strip a cardboard 6 inches long by 1/2 inch for the inside of the tail.
Glue the strip to the cardboard C to make a tail.
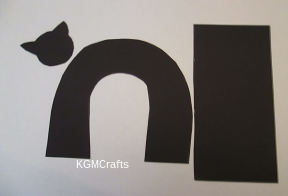
Use the paper pattern to cut the cat out of black construction paper.
By the way I was able to make one cat from one piece of construction paper.
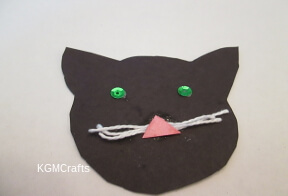
Glue sequins for eyes. Make a pink triangle from paper. Cut three pieces of string the length of the cat’s face. Glue the string to the back of the pink triangle. Glue the triangle to the cat’s face.
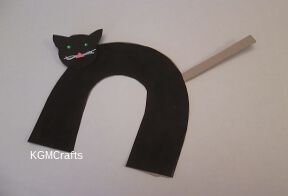
Glue the black paper “C” to the cardboard “C”. Glue the head onto the “C”.
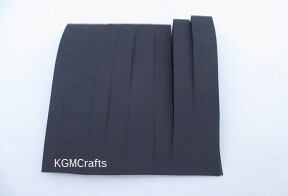
For the tail cut a rectangle 4 by 9 inches out of black paper. Fold the rectangle in half. Cut from the fold to near the cut end. Don’t cut all the way though. Make several cuts about a 1/4 inch apart along the fold.
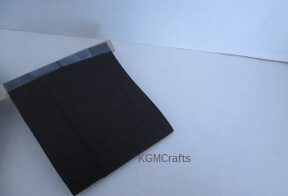
Add tape to one end.
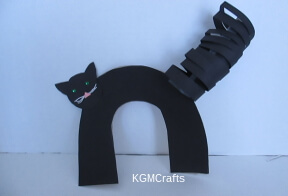
Roll the black paper around the cardboard. When you are done tape the top and bottom of the black paper to the cardboard so that it does not unravel.
This Halloween craft for kids uses paint to make a black cat.
A Friendly Bat
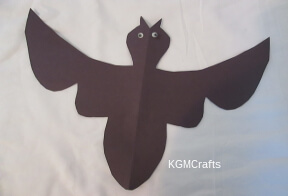
Bats are good in that they come out at night and eat insects. (No, we are not talking about baseball here.) Make several of these Halloween crafts for kids to hang from the ceiling.
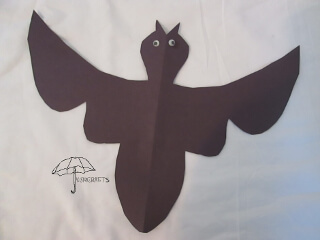
This Halloween Crafts for kids You will need;
- Black paper,
- Scissors,
- Glue
- Wiggly eyes
Or you could leave the eyes off if you wanted to.
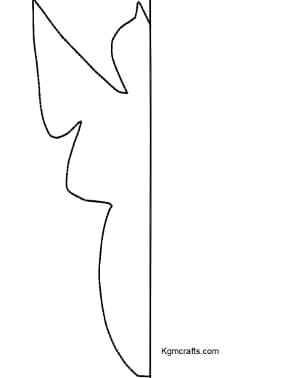
Print the bat template. It is a PDF file.
The bat template is half of the bat so you will need to fold your black paper.
If you don’t want to use the template, here are some drawing directions.
Fold a sheet of paper lengthwise in half. To draw a bat, make a triangle near the top for the ears. Next draw part of a circle for the head. Draw about half way around a 3 ounce drinking cup.
Next draw the wings. Draw a line angling up to the corner of paper that is not on the fold. Then draw a line down. On the bottom of the wing draw an “M” shape. When you finish the “M” draw an oval for the bat’s body.
Now cut around your lines. The only place that you will cut near the fold is just before the ears. When you unfold the paper, you should have a bat. Glue the wiggly eyes on the face.
Halloween Crafts for Kids – Scarecrows
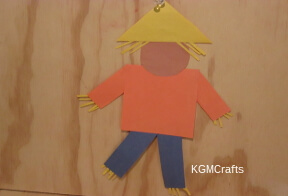
These scarecrows will not scare any crows away and your child will have fun making them.
Scarecrow Pocket Doll
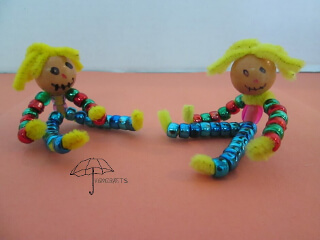
The face is the only thing that makes this look like a scarecrow and makes it a Halloween craft for kids. You could draw a doll face and have a small doll to play with. (This doll reminds me of the dolls that people used to make out of corn husks).
You will need;
- Three yellow twelve inch pipe cleaners
- Wooden bead for the head
- Twelve beads for the arms
- Sixteen beads for the legs
- Larger bead for the body
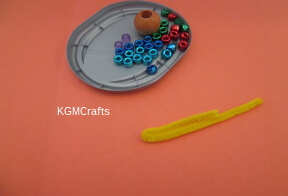
Cut one of the pipe cleaners in half for the arms. Fold one end about three-fourths of the way up.
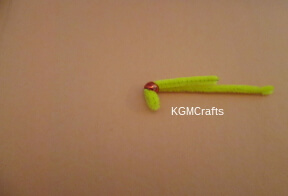
Push both ends of the pipe cleaner into an orange bead. Bend the folded end of the pipe cleaner up some to make hands.
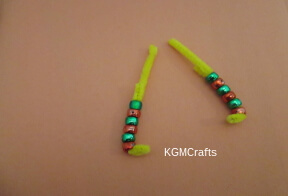
Thread five more beads on the double pipe cleaner. I did a pattern of orange, green, orange. Thread more beads on the other arm.
For each leg use a 12 inch pipe cleaner. Fold one of the ends of the pipe cleaner about three-fourth of the way up.
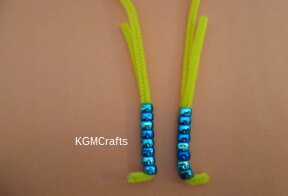
Thread a bead on the pipe cleaners like you did for the arms. This time you will need eight beads for each leg. I used blue beads.
“We are off to see the wizard! The wonderful wizard of Oz!”
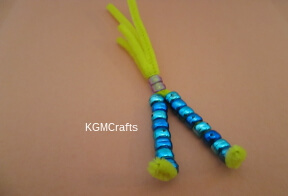
Next thread your legs into the body bead.
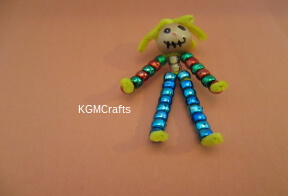
Draw a face on the wooden bead. I drew circles for eyes, a triangle for a nose, and a curved line with stitch marks for the mouth.
Thread all the pipe cleaners through the wooden bead. Fold the pipe cleaners over the bead for hair.
Twist the arms on the neck above the body bead.
The scarecrow will sit, but don’t bend the pipe cleaners back and forth too many times or they will break.
The Drinking Cup Scarecrow
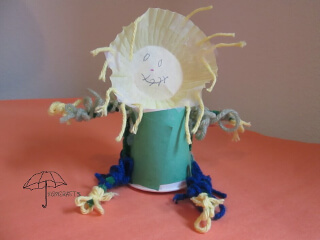
Make a scarecrow Halloween crafts for kids using a paper cup. Place it on the table as a fall decoration.
What you will need;
- 3 oz. cup
- Green paper
- Yellow cupcake liner
- Two 12 inch green pipe cleaners
- Yellow, green, and blue yarn
- Markers
- White glue
- Tape
- Hot glue gun
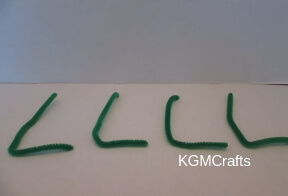
First make the arms and legs of the scarecrow. You need to cut both of your pipe cleaners so that you have four pieces. Each piece needs to be 3 1/2 inches long. Fold each piece 1 inch, so that you have four “L” shapes.
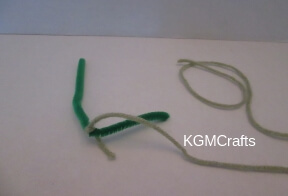
To make the arms take one of your “L” shapes. Cut a piece of green yarn 36 inches long. Tie the one end of the yarn to the bend of the “L”.
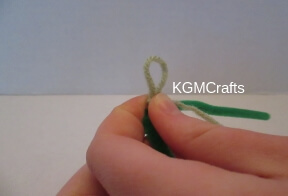
Make a small loop with the yarn.
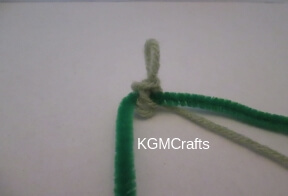
With the loose end of yarn, place it behind the pipe cleaner. Wrap around the pipe cleaner and around the loop. Next place the yarn behind the pipe cleaner.
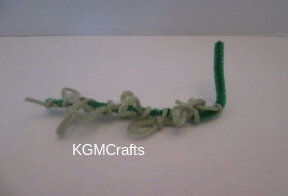
Make another loop on other side wrap over the pipe cleaner around the loop. Continue until you are at the top of the “L”.
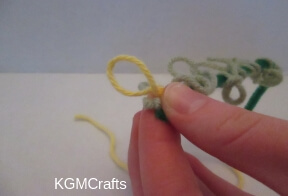
Now cut a piece of yellow yarn 12 inches. Tie it to the top of the “L”. With the piece of yellow yarn make a loop wrap the end of the yarn around the loop and pipe cleaner.
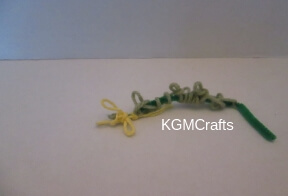
Pull the end through the piece around the pipe cleaner. This is like making a bow when tying your shoe. Make two more loops.
Do the same as above with the other arm. Also do the same with the legs, however use blue in place of the green. (He needs his arms and legs so that he can protect the candy corn fields!)
Now that your arms and legs are done you can go to the next step.
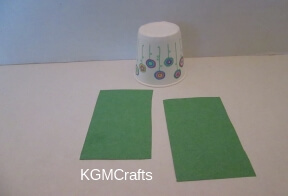
Cut two pieces of green paper each being 2 by 3 1/2 inches. Glue with white glue to your 3 oz cup.
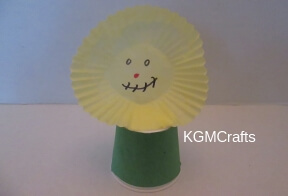
With your cupcake liner make a scarecrow face. If you use markers, make sure that there is something underneath the cupcake liner so that it doesn't bleed through. Tape your cupcake liner to the bottom of your 3 ounce cup. Cut small pieces of yellow yarn and tape around the cupcake liner.
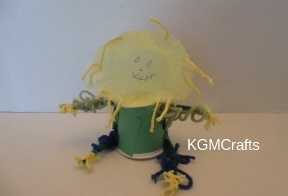
Warm up your hot glue gun. Glue your scarecrow’s arms so that they stick outwards. Glue your scarecrows legs so that they make him look like he is sitting down.
He is using camouflage to scare the crows.
A Little More Scary Halloween Crafts for kids
Skeletons, monsters, and mummies make great Halloween crafts for kids.
A Skeleton
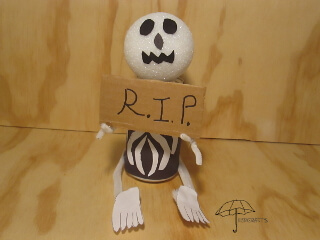
Rest in peace, my friend.
What you need;
- Pop can (12 fl oz)
- Black paper
- White paper
- A piece of cardboard
- White 3-inch Styrofoam ball
- 5 12-inch white pipe cleaners
- Black marker
- White glue
- Glue stick
- Hot glue
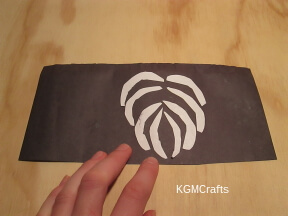
Cut a piece of black paper 9 by 4 1/4 inches.
With white paper, cut 8 pointy bone-like shapes that are about 1 inch in thickness and about 2 inches in length. The bones will be used to make the rib cage. With a glue stick, glue the 8 bones in a rib cage arrangement.
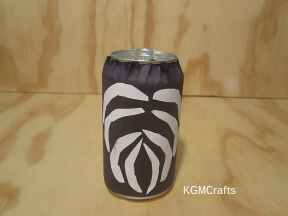
You will want them to line up from the center of the mouth of the pop can.
Glue with white glue to the pop can, creasing the paper at the narrow top.
Let dry.
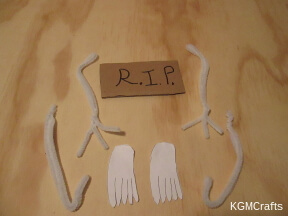
Cut two pieces from a 12-inch pipe cleaner that are both 2 1/4 inches. These two pieces will be the extra fingers you will need for the skeleton's hands.
To make the arms, fold a 12-inch pipe cleaner in half. At the double ends twist so you have two ends that are both 1 1/4 inches. Bend back 1 1/4 inches. Do the same to another 12-inch pipe cleaner.
Take one of the 2 1/4 inch pieces of pipe cleaner and twist it end at the center of the other two ends of one of the arms. Do the same to the other finger and arm.
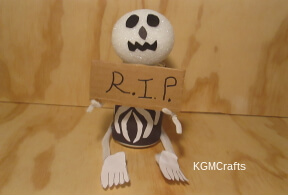
Cut a piece of cardboard 3 3/4 by 2 inches. Write with your black marker "R.I.P.". Which is the acronym for "Rest In Peace".
To make the legs, take another 12-inch pipe cleaner and fold it in half. Twist the ends together and bend the other side 1 inch. Do the same to another 12-inch pipe cleaner.
Out of white paper cut out two ovals that are about 2 1/4 by 1 inches each. At the end of each oval draw and cut out toes. These will be the feet.
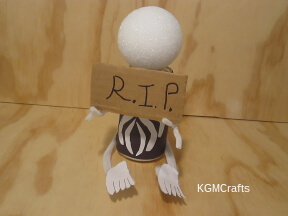
Heat up your hot glue gun. Take the two pipe cleaner arms and hot glue the bent ends near the top side of the can. You will want the hands pointing out toward you. At the fingers hot glue the sign with one finger from each hand in the back and the other two fingers of each hand in the front.
Hot glue the legs near the bottom side of the can. Hot glue a foot on each of the skeleton's legs at the bent part.
Hot glue the Styrofoam ball at the drinking part of the pop can.
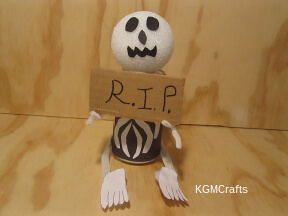
Out of black paper cut out two small circles for eyes, a very small pointy oval for a nose, and a zigzag smile for the mouth.
Hot glue all the facial features on the Styrofoam ball.
Frankenstein
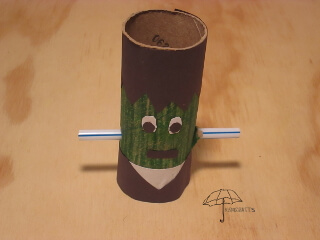
I am not really a monster.
Supplies;
- Toilet paper roll
- Green marker
- a Scrap of black construction paper
- a Scrap of white paper
- Glue stick
- Straw
- Hole punch
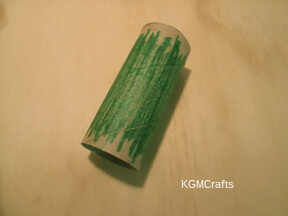
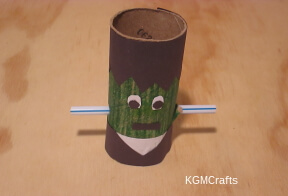
Color your toilet paper roll green.
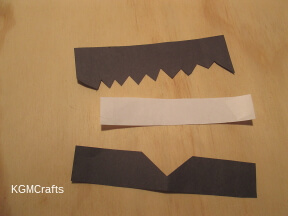
Cut a piece of black construction paper 5 1 /2 by 1 1 /2 inches. Cut zigzags on one long end for hair. Glue the top to the cardboard tube.
Cut another piece of black construction paper 5 1 /2 by 1 inches. Fold in half. Start at the fold cut on an angle to the cut end.
Cut a piece of white paper 5 1/ 2 by 7 /8 inches. You want is slightly narrower than the black piece with the angle cut.
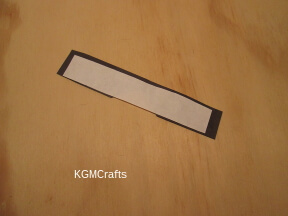
Glue it under the black paper with the slit in the center. When you glue it to the bottom of the toilet paper roll it will look like he is wearing a white shirt under a black jacket.
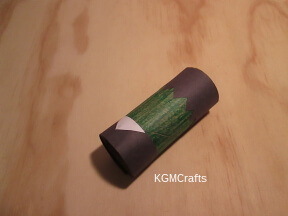
Glue the hair and clothes to the toilet paper roll.
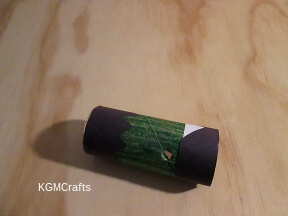
Make a hole on each side 1 1/2 inches from the bottom.
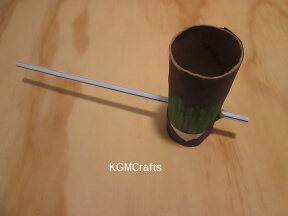
Add a straw. Cut it so that there is about 1 inch on each side so that it looks like Frankenstein's neck bolts.
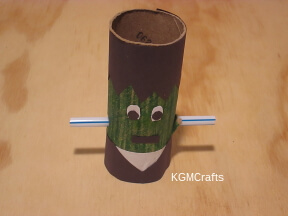
Use the hole punch to make pupils for the eyes. Glue the dots on white paper. Cut around the pupils to make ovals for the eyes.
Cut a small rectangle for the mouth. Glue the eyes and mouth on the green part of the cardboard tube.
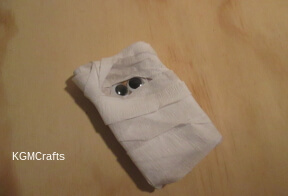
Mr. Mummy
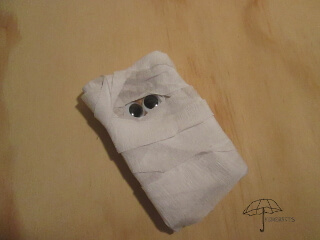
But Mom I don't want to go to sleep yet.
You will need;
- Cardboard tube
- Wiggly eyes
- Glue
- White streamer
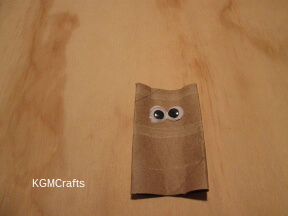
Flatten your cardboard tube. Add wiggly eyes about an inch from the top.
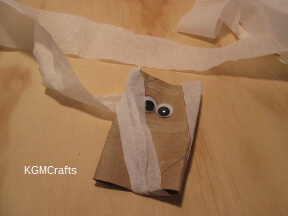
Tuck the streamer in the top hole in the tube. Wrap the streamer from top to bottom and around the cardboard tube.
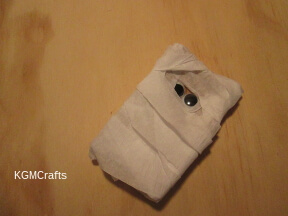
Wrap so that the eyes show. When you are done cut the streamer and tuck the end under one of the wraps.
Halloween Crafts for kids - treats
The holiday wouldn’t be special without treats. With these Halloween crafts for kids you can “dress-up” candy to look like spiders, monsters, and jack-o-lanterns. If your school is having a no sugar party you can decorate juice or raisin boxes to make a special treat. (“Trick or treat!”)
Spider Treat
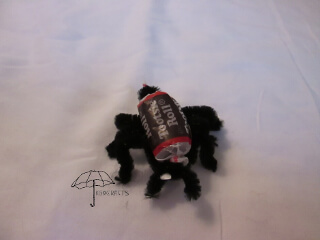
No one will be scared of this cute treat. This Halloween crafts for kids tastes good, it is chocolate.
You will need;
- Black pipe cleaners
- Tootsie Rolls
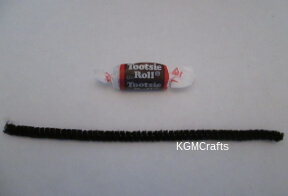
Take a Tootsie Roll and a 6 inch pipe cleaner.
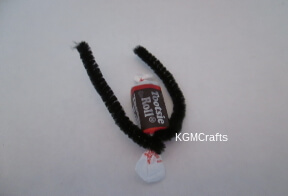
Fold the pipe cleaner in half wrapping once around one end of the Tootsie Roll.
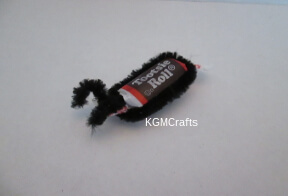
Bring the pipe cleaner along each side of the Tootsie Roll. You will have two small ends and the pipe cleaner should be tight around the tootsie roll. Fold the remaining ends into fangs.
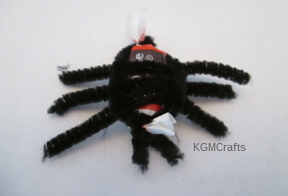
Take three 3 inch pipe cleaner and thread them under your pipe cleaner (the one on the Tootsie Roll) on the bottom.
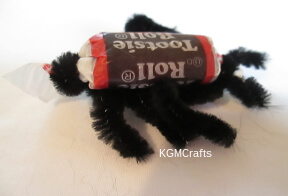
Crease the legs on each side and bend the bottom of the three pipe cleaners. Your spider is now done!
Don’t Bug Me Treat Bag
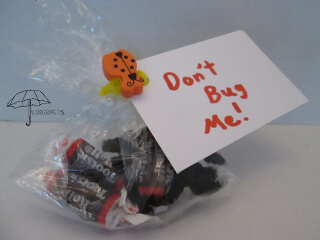
You will want to make several of these Halloween crafts for kids to give to your special friends. We wrote, “Don’t bug me”, but you could write Happy Halloween, or Trick or Treat.
You will need;
- Foam Bug Beads
- Six inch pipe cleaner
- Plastic loot bags
- Candy
- Spider from craft above (optional)
- Cardstock
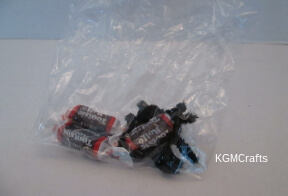
Fill your bag with several pieces of candy and a spider or other small treat.
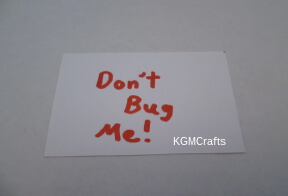
Cut a piece of cardstock 3 inches by 2 inches.
Write your message on the cardstock. With a hole punch make a hole.
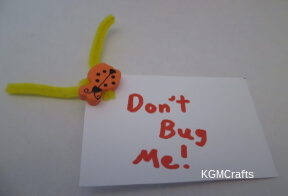
Thread a pipe cleaner through a bead and into the hole of the card so that the bug bead sits on top. Twist the pipe cleaner gently so that the bug is sitting on the card.
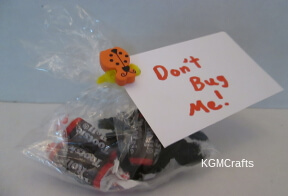
Twist the pipe cleaner around the bag to close.
Create monster Halloween crafts for kids. There fun, easy and good to eat.
Dot Treat Monster
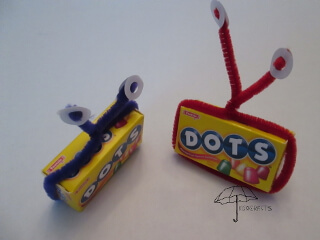
You will need;
- Small box of Dots or similar candy
- Pipe cleaner
- Reinforcement labels (circle stickers that go on hole punched paper)
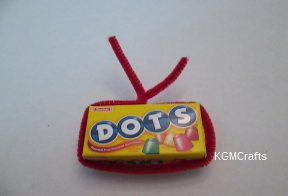
Place the box in the center of your pipe cleaner. Wrap the pipe cleaner around the box. Twist the end near the top of the candy box
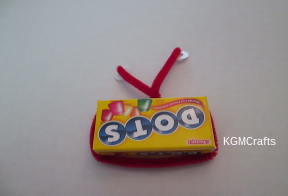
Place reinforcement labels on the ends of the pipe cleaner.
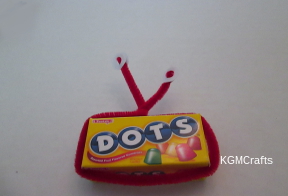
Turn your box over and place two more reinforcement labels on the ends.
Juice Box Monster
You will need;
- Individual juice box
- Two straws with bendable tops
- Washi tape
- Reinforcement labels
- Scissors
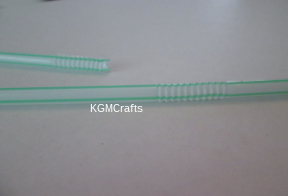
Pull the flexible part of your straw so that the bend is all the way out.
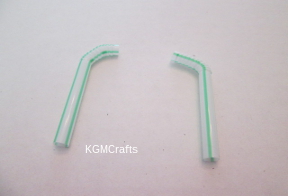
Cut the top off just below the bend on the longer side.
Bend the piece some.
Do the same with the other straw.
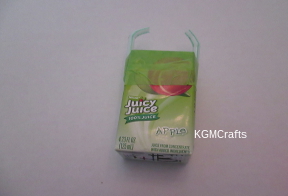
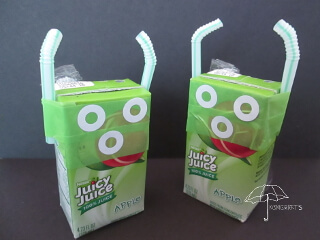
With Washi tape, tape the two straw tops to the side of the juice box. The bend pieces should be sticking above the box.
Add another piece of Washi tape.
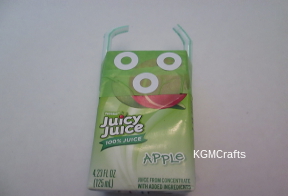
Add three reinforcement labels two for eyes and one for a mouth.
Candy Jack-O-Lantern
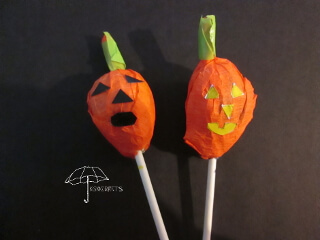
Jack-o-lanterns make great Halloween crafts for kids.
For this Halloween Crafts for Kids You Will Need;
- Tootsie Pop
- Orange crepe streamer
- Green washi tape
- Black duck tape
- Hole punch
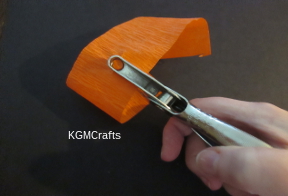
Cut two pieces of orange crepe streamers 8 inches.
With a hole punch make a hole in the center of each streamer.
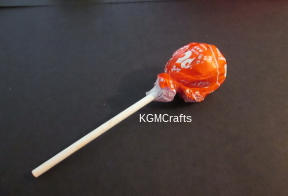
Push the wrapper on the stick of the Tootsie Pop up.
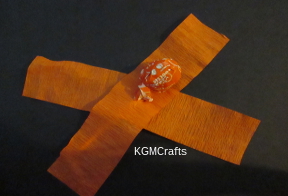
Thread the streamers on the stick of the Tootsie Pop making a cross shape.
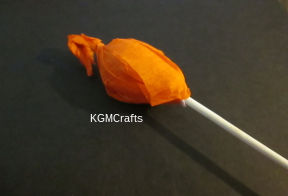
Bring the streamer up to the top of the candy and twist. Fold the twisted top down to make the Jack-o-lantern’s stem.
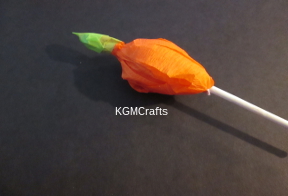
Cover the Jack-o-lantern’s stem in green Washi tape.
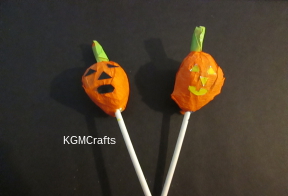
Make triangle eyes and a circle for the mouth from black duck tape or yellow washi tape. I didn’t have yellow washi tape so I used a sticky label and colored the shapes yellow.
Add the eyes and circle on the Jack-o-lantern.
Raisin Box Monster
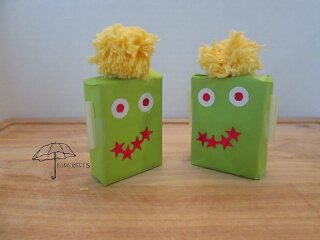
Here is another monster that will please kids and moms alike.
You will need,
- Raisin box
- Tissue paper
- Reinforcement labels
- Straw
- Star stickers
- Tape
- Yarn for pompom
- Fork
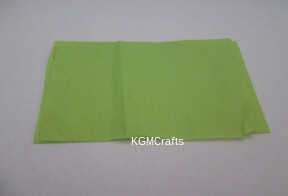
Cut a double piece of tissue paper 6 1/2 by 4 inches. I used green.
Wrap your box with the tissue and tape the ends.
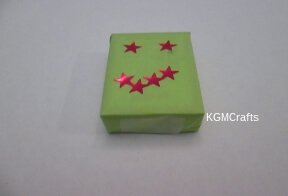
Add star stickers for eyes and a mouth.
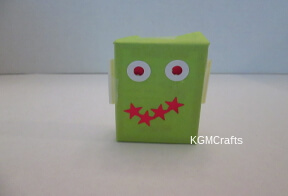
Place reinforcement labels over the star eyes.
Cut two pieces of straw 1 1/4 inches for the ears. Tape the straws to the sides of the box.
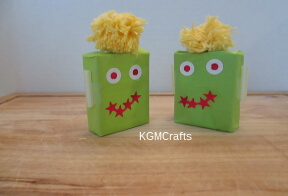
Tape a pompom to the top. Below are directions on how to make one.
You can learn how to make pompoms here. I used a fork to make the pompom for the top of the raisin box. The fork also makes cute dust bunnies.
Give Halloween crafts for kids to your special friends. Or I am sure that you’re your brother or sister or mom would love them!
Now that you have some Halloween crafts for kids to make, gather some friends and have a party!
