16 Farm Animal Crafts for Kids
by Karen & Grace Morris
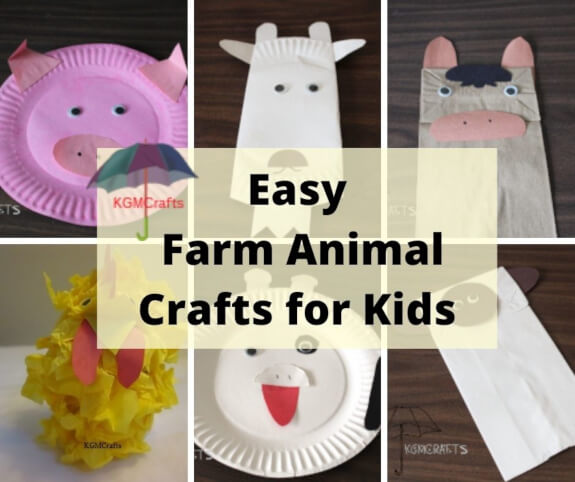
Let’s have some barnyard fun with farm animal crafts for kids.
By using paper plates, bags, or small paper cups you will have lots of cute creatures.
The farm animal crafts would be a fun activity after visiting a farm or petting zoo. Fairs sometimes also have areas where young children can pet different animals.
Paper Plate Farm Animal Crafts for Kids
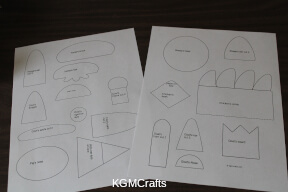
The paper plate farm animal crafts are so easy to make. There is a handy-dandy template to download with the ears, horns, and other items to make the animals cute. So grab a package of paper plates and some preschoolers, so we can get started.
By the way, the templates are sized so that if you want to make paper bag puppets instead of using paper plates, you can.
For the Paper Plate Farm animal Crafts, You Will Need;
- PDF of pattern pieces
- Colored construction paper mostly brown, black, white, pink, red, and orange
- Scissors
- Wiggly eyes
- Glue stick
Chicken
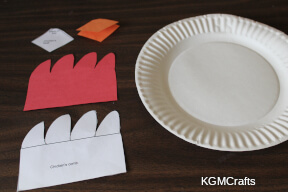
Download and print the PDF. Use the pattern to cut the beak and comb from construction paper.
Cut out the comb from red paper. Fold an orange or yellow 4 1/2 by 3 inch rectangle in half. Place the pattern of the beak on the fold and cut out.
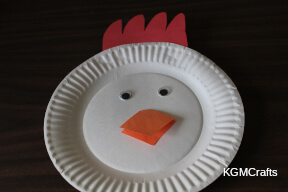
Glue the comb to the back of the paper plate. Glue the eyes on the front of the plate below the comb. Then glue the beak below the eyes.
Cow
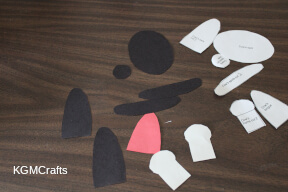
To make a black and white cow, cut spots and ears from black paper. Cut the horns and nose from white paper. Cut the tongue from red construction paper.
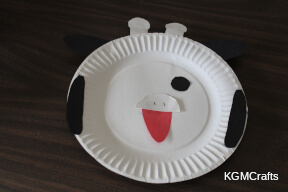
Glue the horns on the back of the plate at the top center. Glue the ears next to the horns so that they are pointing out. Add the two oval spots to the sides of the plate. Glue the tongue near the center. Glue the nose over the tongue. Add two dots to the nose for the nostrils. Glue the spot for under the eye.
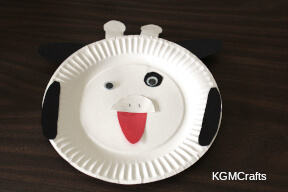
Glue on wiggly eyes.
Sheep
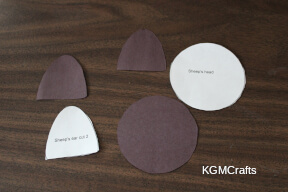
Leave the plate white. Cut out the face and ears from black paper.
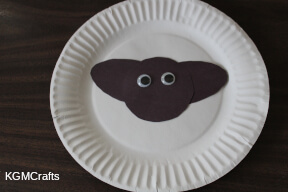
Glue the ears to the sides of the circle, then to the center of the plate. Add wiggly eyes to the black circle. You could give your students cotton balls or white tissue balls to cover the white part of the plate.
Goat
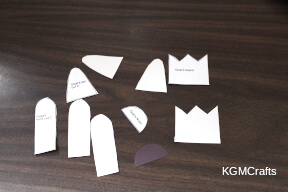
Goats can be brown, white, or black. So leave the plate white or color it a different color. Cut horns from white paper. Cut the ears and beard to match the color of the plate. Make the nose black.
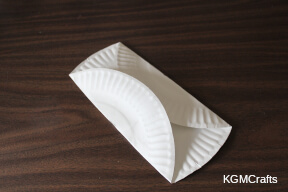
Measure from the sides, 2 inches. Fold the plate on this mark.
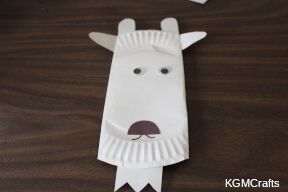
Glue the horns on the top of the plate under the fold. Glue the ears on the sides near the horns.
Draw a mouth near the bottom rim. Add the nose near the mouth.
Glue the beard on the bottom of the rim.
Add the wiggly eyes.
Horse

To make the horse from a plate, you will need to fold the side to the center. Paint the plate if you want, or make a white and black horse.
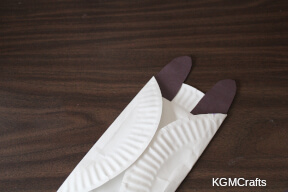
Cut the ears, hair, and nose from construction paper. Glue the ears to the back of the plate just under the fold.
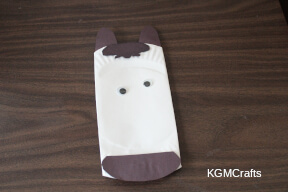
Glue the hair on the front between the ears. Glue the nose to the bottom of the plate. Add eyes to the top center.
Pig
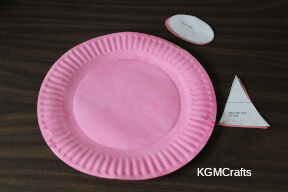
Paint a paper plate pink. An easy way to do this is to place a glob of liquid paint on the plate. Use a large sponge brush to move the paint around the plate. Let the paint dry. Then cut out the ears and nose from pink paper.
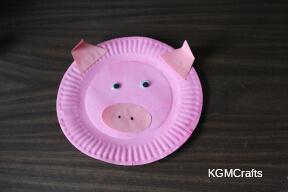
Glue the ears to the top of the plate. Then fold the tips of the ears to the center. Add two black dots on the nose and glue to the plate. Add the wiggly eyes.
By the way, you could paint the other plates before making the chicken, horse, or cow.
Here are more paper plate crafts.
Paper Bag Puppets Farm Animal Crafts for Kids
You can also use the farm animal crafts for kids templates to make paper bag puppets. The steps are similar. Besides the PDF and craft supplies, you will need white and brown lunch size paper bags.
Cow
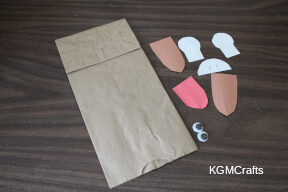
To make a brown cow, use a brown bag. Cut the ears from brown paper. Cut the horns and nose from white paper.
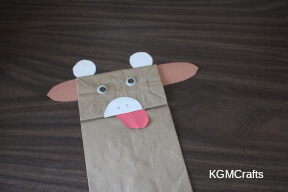
Place the bag so that the flap is on the top. This will be the face. Glue the horns behind the top corners. Also, glue the ears to the sides just below the top corners.
Glue the tongue under the flap. Glue the nose to the center of the flap. Add wiggly eyes above the nose.
Goat
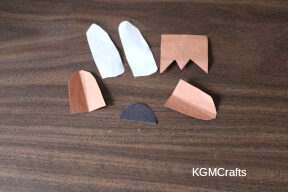
Use a brown paper bag. Cut ears and beard from brown paper. Cut the nose from black and the horns from white.
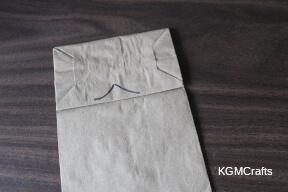
With a marker, draw a mouth.
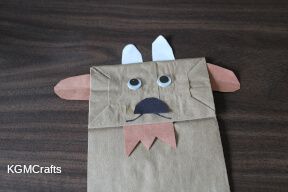
Glue the horns to the back of the bag near the center. Glue the ears to the top side. Add eyes, mouth, and nose to the flap area. Glue the beard under the flap.
Horse
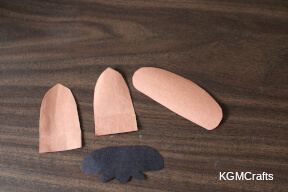
Choose the color of horse you want to make. The one in the picture uses a brown bag. Cut the hair, snout, and ears from construction paper.
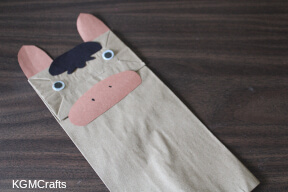
Glue the ears behind the bag at the top. Glue the snout near the flap of the bag.
Pig
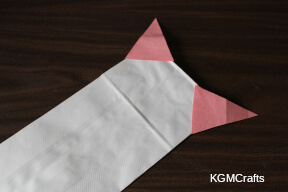
From pink paper, cut two ears and a nose. Glue the ears to the back of the bag at the top corners.
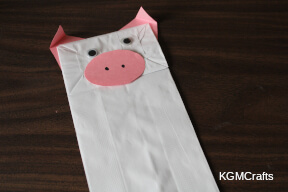
Turn the bag over and add the nose and eyes.
Sheep
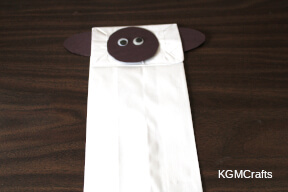
You will need a white paper bag. Cut out the ears and head from black paper. Glue the head to the flap. Add the ears to the sides of the bag. Add the eyes to the black circle.
Chicken
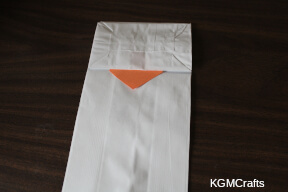
Cut the beak from orange or yellow paper. Don't place on the fold, but cut two beaks.
Place one beak under the flap on the bag.
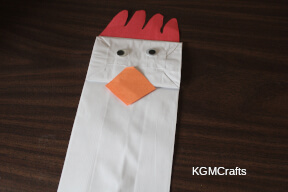
Glue the top part of the beak on the flap. Glue the comb on the back of the bag. Add wiggly eyes.
Farm Animal Crafts for Kids – Paper Cups
School age children can easily make puppets out of paper cups. After making the animals, let your children act out the song Old MacDonald Had a Farm. Or let the kids play a farmer for the day.
For each farm animal, you will need a 3 ounce cup. The sheep, horse, cow, and pig use pipe cleaners for the legs.
Here are some general directions for making farm animal crafts for kids;
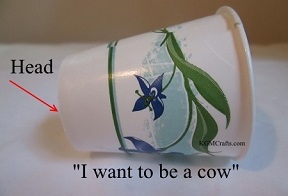
The bottom of the cup is the head of the animal.
Now that you got the basic of the animals done, let’s make them cute!
Chicken
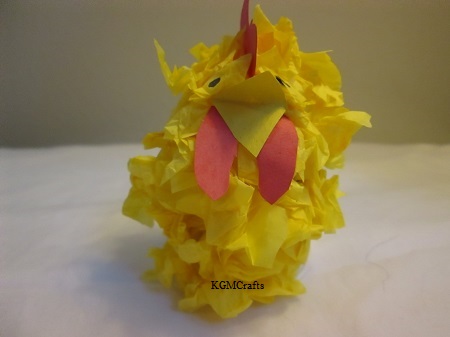
This chicken would be cute sitting on a dish of Easter candy.
You will need;
- A cotton ball (tripe size)
- Yellow tissue paper
- Small pieces of red and yellow construction paper
- Black marker
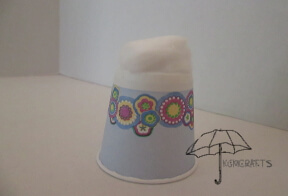
Take your paper cup and glue a cotton ball to the bottom. This will be the chicken’s head.
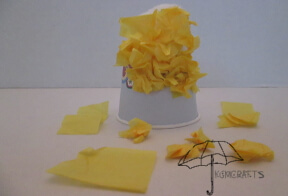
Now make feathers out of tissue paper. Cut tissue paper into 1 inch squares. Crumble the paper up. Then glue the balls to the cup. The tissue balls will unfold and look like feathers. Your chicken will no longer be cold.
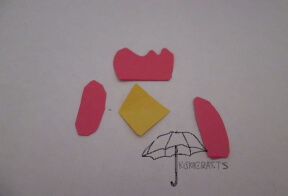
Make an oval like shape for the wattles and a crown shape for the comb out of a small piece of red paper. Cut a small piece of yellow construction paper into a diamond shape. Fold the shape in half so that it is a triangle. Glue the pieces to the chicken.
Draw eyes with a black marker.
Farm Animal Crafts for Kids
a Sheep, Horse, Cow, and Pig
How to make Legs
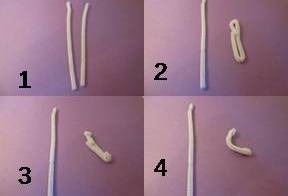 how to make the legs of the sheep, horse, cow, and pig
Make the legs for the cow, horse, pig, and sheep out of twelve-inch pipe cleaners. Cut the pipe cleaner in half. Take one six-inch piece and fold the ends to the center. You do not need to be exact. Then fold the ends over to make feet. Fold the piece into a C shape.
Sheep
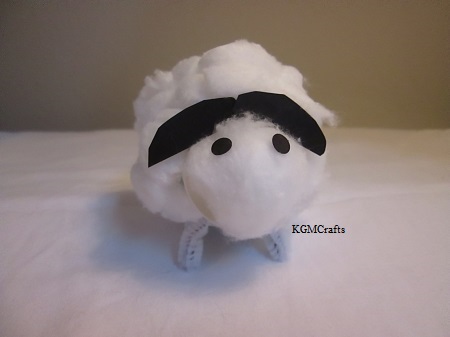
Bah, Bah, Black Sheep… Well, this sheep is white, but you can still sing the song. Sheep are great farm animal crafts for kids.
You will need;
- Glue,
- Five cotton balls (tripe size),
- A white pipe cleaner,
- Black paper
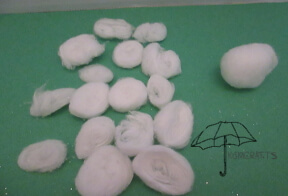
Cut the other four cotton balls into fourths. (You do need to cut the cotton into fourths, if you don’t the sheep is too fat.)
Glue one cotton ball to the bottom of the cup.
Make legs out of white pipe cleaners twelve-inch long. See the picture and directions above. Now your sheep can walk.
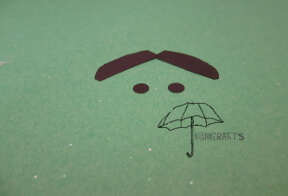
Make ears out of black construction paper. I cut a 1-inch oval in half.
Used a hole punch to make eyes out of black paper. Glue the pieces to the sheep.
 How to cover cup.
Cut two pieces of construction paper two inches by three and half inches to cover the sides of the cup for the cow, pig, and horse.
Horse
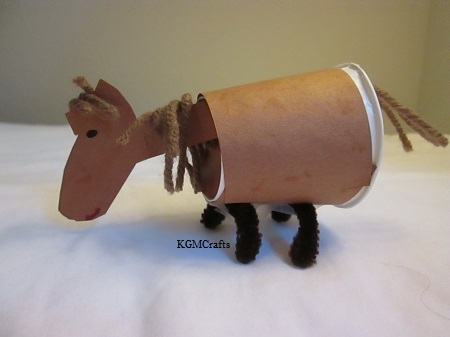
Every farm needs a horse.
You will need;
- Brown paper,
- Brown pipe cleaner,
- You will also need a small piece of brown yarn
Cover the cup with brown paper. See the directions above.
Trace the bottom of your cup on brown paper. Cut the circle out and glue to the bottom of the cup.
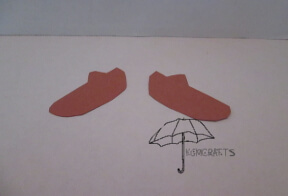
To make a head, cut an oval with triangles for ears. You are going to want to make two of these.
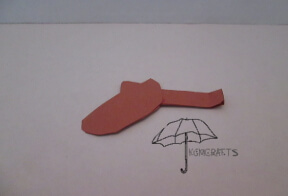
Cut 1 1/2 by 1 inches of brown paper and fold in half widthwise. Put your folded piece of paper between the two heads to make the neck and glue.
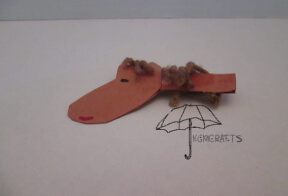
Draw a face with a black and red marker on the horse's head. Fold the end of the neck. Glue small pieces of brown yarn on the neck and between the ears for the horse’s mane. Manes are good for holding when you ride bareback. Glue the head to the horse's body.
Use brown pipe cleaners for the legs. Make the legs like you did with the sheep. See picture above.

Make a tail out of brown yarn. Hot glue or tape to the top of the cup. Your horse is complete. (Neigh!)
Cow
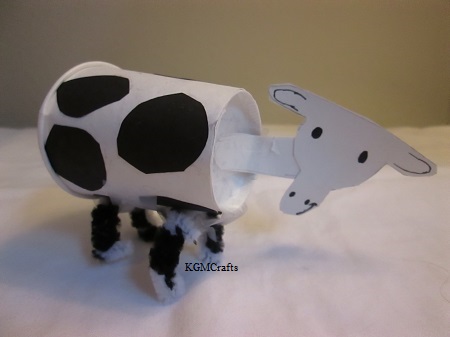
Make the cow similar to the horse. Have you realized that these farm animal crafts for kids also are finger puppets?
You will need;
- White paper
- Black paper
- Black marker
- White and black pipe cleaners
Cover the cup with white paper. The directions are above.
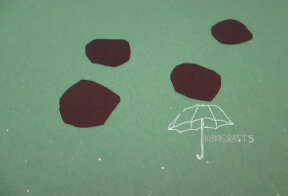
Make spots with black paper, and glue the spots to the cup. Cows come in other colors too. I have seen brown and black cows.

To make the head, cut an oval for the snout, rectangles for the ears, and a circle in the center out of white construction paper. You are going to want to make two of these. Cut 1 1/2 by 1 inches of white paper and fold in half widthwise.
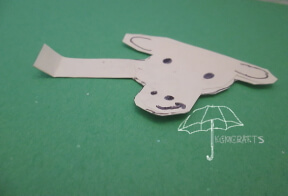
Put your folded piece of paper between the two heads to make the neck and glue. Use a black marker to make a face. Fold the end of the neck and glue to the bottom of the cup.

With a white pipe cleaner, make the legs similar to the horse or sheep. (see above) Make spots with small pieces of black pipe cleaners. Then tape or hot glue the legs to the side of the cup.
On our farm we have a chicken, a lamb, a horse, and a cow. What other farm animal crafts for kids do we need to make our farm complete?
Pig
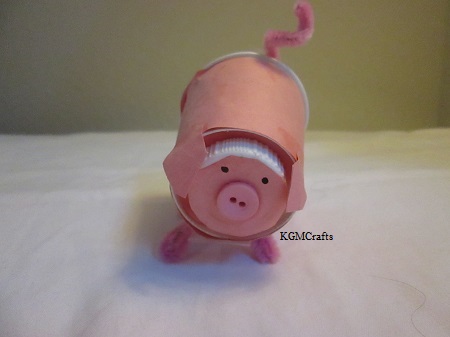
To make Miss Piggy, you will need;
- Pink paper,
- Button,
- Two Pipe cleaners
- You will also need a bottle cap that will fit on the bottom of the cup.
- Tacky glue
- White glue
- Cotton ball
Make a circle of pink paper to cover the bottom of the cup. Cut out two pink rectangles to cover the sides, just like you did with the cow and horse. (See above)
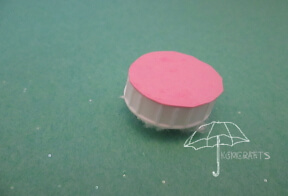
Cut a circle out of pink paper that will fit on the outside of the bottle cap. Glue the circle to the cap.
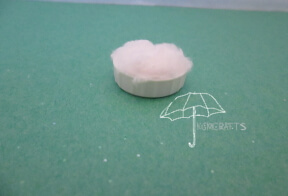
Put a cotton ball in the inside of the bottom cap, and glue.
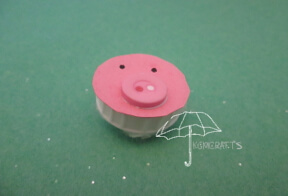
Glue a pink button on for the nose and with a marker draw on eyes.
Glue the bottle cap on the outside of the bottom of the paper cup with tacky glue.
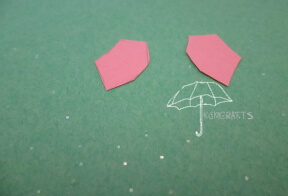
Make two pointed square shapes for ears out of pink paper, glue on ears with white glue.
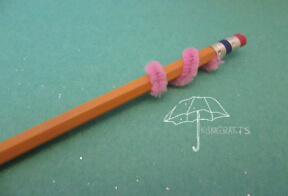
Make a tail by twisting a small piece of pipe cleaner around a pencil. It will look something like a corkscrew. Take the pipe cleaner off the pencil. Tape or glue to the cup.
Make legs out of a pink pipe cleaner like you did with the sheep, cow, and horse. (Directions above.)
We hope that you have enjoyed making our farm animal crafts for kids as much as we have designing them.
