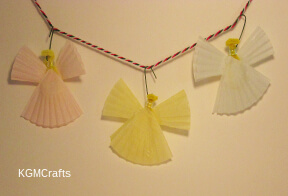
7 Christmas Angel Crafts
by Karen & Grace Morris
Here is a collection of Christmas angel crafts for kids. Decorate your house this holiday with these heavenly hosts.
Decorate a tree, table, or wall with these crafts. Some would also look nice on a package.
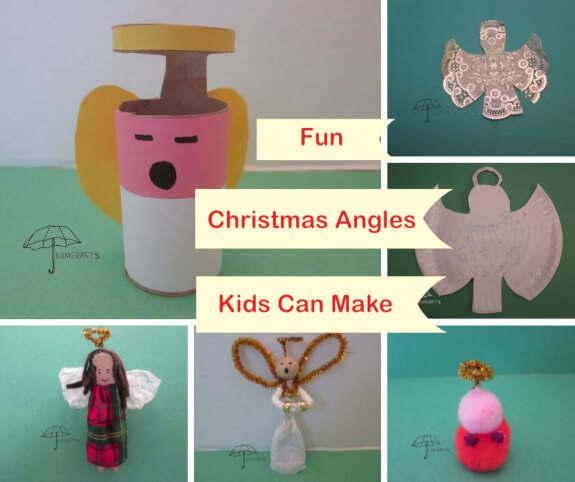
Click the picture to go to the Christmas angel crafts on the page.
While you creating Christmas angel crafts,
sing some carols
with us.
Toilet Paper Roll Angel
These would make cute placeholders at your table this Christmas.
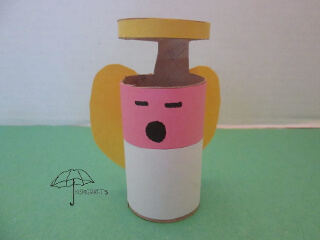
What you need;
- One toilet paper roll
- Yellow, pink, and white paper
- Black marker
- Glue stick
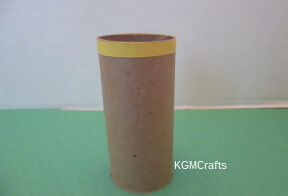
Cut 6 inches by 1/4 inch of yellow paper, glue at the top of the toilet paper roll.
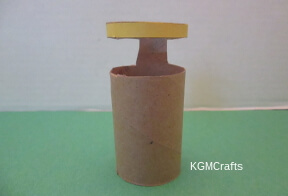
To make the angel’s halo, cut 3/4 of an inch around the yellow paper, leaving a strip of the paper roll in the back.
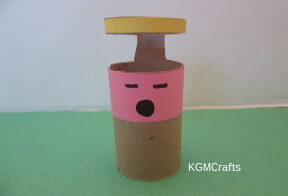
Cut 6 inches by 1 inch of pink paper, glue to the toilet paper roll under the halo. Make a face with the black marker. I made two lines for close eyes and a circle for a singing mouth.
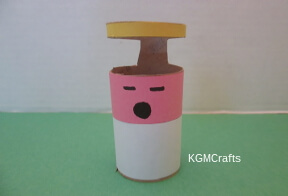
Cut 6 by 1 1/2 inches of white paper, glue to the toilet paper roll under the pink paper.
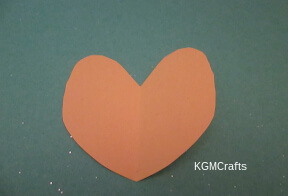
Fold a 3 1/2 by 4 inches of yellow paper lengthwise in half and cut out a heart shape. These will be the angel’s wings. Glue them on the back so that they stick up from the back.
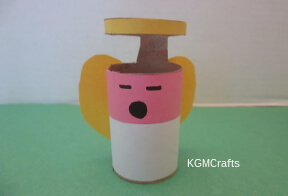
Glue the wings on the back.
“Hark! The herald angel sings, ‘Glory to the newborn King".
Unique Angel
You can stick the prongs of the fork in Styrofoam so your Christmas angel craft can stand. Or you could put it in one of your potted plants.
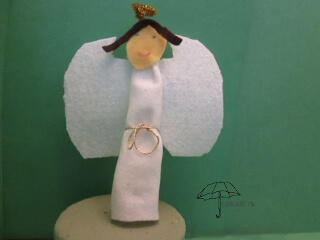
What you need;
- A fork
- White, sparkly white, tan, and brown craft felt
- Gold craft thread
- Gold Chenille stems (pipe cleaner)
- Blue and red markers
- Tape
- Tacky glue
- Styrofoam
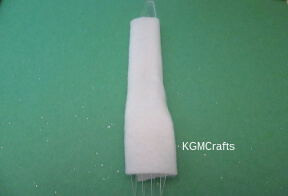
Hold the prongs of the fork away from you. This will be the font of the angel.
Cut a piece of white craft felt about 3 1/2 by 5 1/2 inches. You want it to cover most of the fork, but leave part of the prongs and the top of the handle showing. Tape it together.
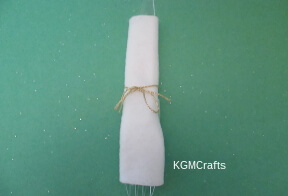
Cut a piece of the golden craft thread about 11 inches long. Tie it in a bow to the center of the white felt that you just taped on the fork.
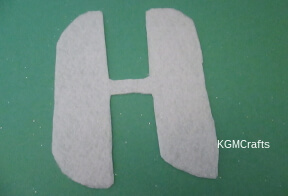
Cut 5 1/2 by 4 inches of the sparkly white craft felt in a wing shape. It looks something like a "H". Tape to the back of the fork.
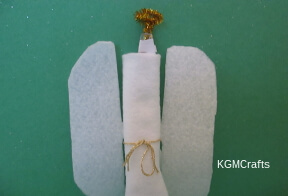
Cut a 3-inch piece of golden pipe cleaner and twist it on top of the handle of the fork. Secure with tape. Twist the top part into a halo.
Cut a small piece of white craft felt about 3/4 by 1 inch. Tape it to the top part of the handle of the fork where you have put the pipe cleaner.
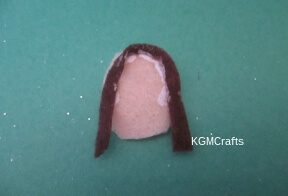
Cut a small piece of tan craft felt in a circle. Cut also a small slender piece of brown craft felt and glue to the tan circle at the top for hair glue with tacky glue. Make a face with the blue and red markers.
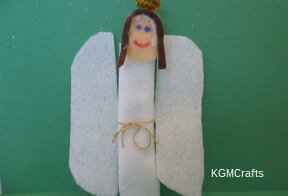
(I just made two blue eyes and a red month). Glue the tan head on the white felt at the top of the fork’s handle. Let dry.
Stick the fork into the Styrofoam. Your angel is now ready for Christmas!
“And suddenly there was with the angel a multitude of the heavenly host praising God saying, “Glory to God in the highest, and on earth peace, good will toward men.”” Luke 2:13-14 KJV
Pompom Angel
This is an easy craft that your younger kids can make to decorate the bookshelf. You could also make several of these Christmas angel crafts and attach them to packages.
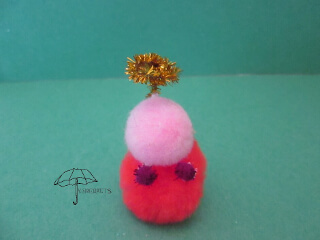
What you will need;
- 1 medium orange pompom
- 1 small pink pompom
- 2 min purple sparkly pompom
- 1 sparkly gold pipe cleaner
- Tacky glue
You can visit this page on our site to find a picture of the pompom sizes, there are other fun pompom crafts there.
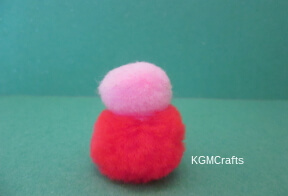
Take your pink pompom and glue it on top of the orange. The pink is the head and the orange is the body.
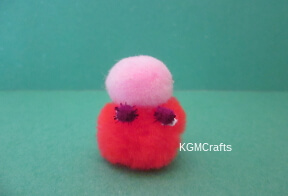
Glue your two purple on the side near the head. These are the angel’s hands.
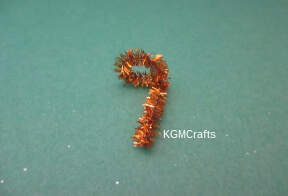
To make the halo, cut a 3-inch piece of pipe cleaner. Twist one end of it into a circle.
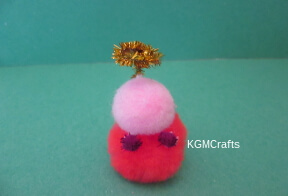
Glue the other end on the back of your angel so that it sticks up a little.
Let dry overnight.
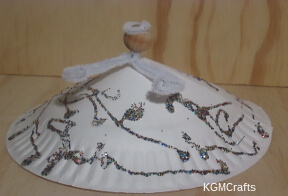
Doily Angel
The doily angel is similar to the paper plate angel below.
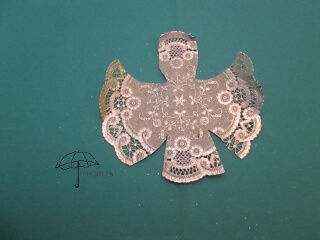
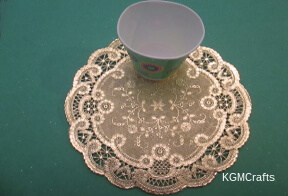
Use a bottom of a 3 ounce cup or a 1 1/2 inch circle to help draw the head. Place the cup 1 inch below the edge of the doily or on the solid part.
Draw around the sides of the circle. You will want to leave the lacy part of the doily on. When you get near the bottom of the cup, draw a curved line up to the edge of the doily for the wing. If you are using a pencil, the lines will not show much.
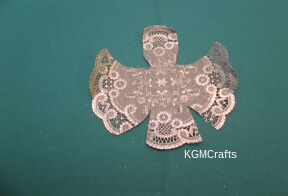
Make two slits, 1 3/4 inches from the bottom of the doily. Angle the slits toward the wing.
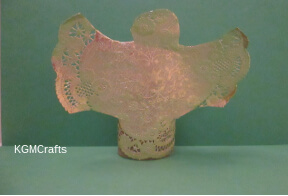
If you want your angel to sit on the table, fold the bottom ends and tape to an empty toilet paper roll.
“Angels we had heard on high!”
Christmas Angel Crafts for the Tree
Christmas angel crafts make great tree decorations!
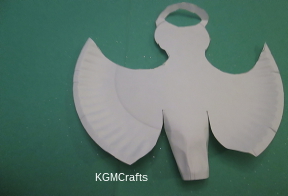
Paper Plate Angel
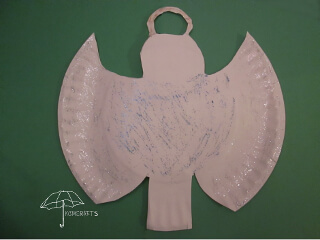
All you need is a paper plate, a pencil, and scissors.
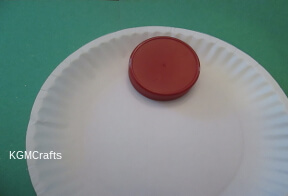
To make the head, used a 2 1/2 inch jar lid to draw a circle. Place the jar lid on the plate about 1 inch from the edge. Draw most of the way around the lid.
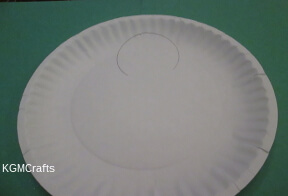
When you get near the bottom of the lid, draw a curved line back to the rim and off the edge for the upper part of the wing.
To make the halo, draw an upside-down “C” on the rim above the circle that you just drew.
For
the bottom of the wing, draw two lines 2 1/2 inches from the bottom of
the plate. The lines will a line with the shoulders of the angel. Round
the lines at the bottom to make the ends of the wings.
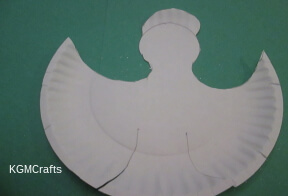
Cut on your lines.
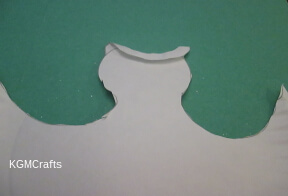
Fold the piece that will become the halo down and cut out the inside the “C” shape. You will need to round the outside of the halo some.
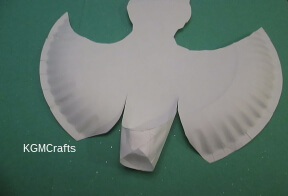
You can fold the flaps to the back of the plate and tape. Then you can place it on top of your tree. Or you can cut the flaps off and use the angel to decorate a wall.
Leave the angel white. Another option would be to color it or use glitter.
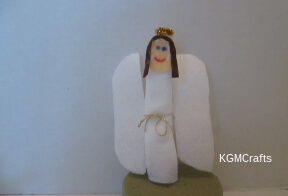
Wooden Clothespin
Even though this requires some hand sewing, it is easy. Older children will enjoy making this ornament for the tree. Or they can give one to their grandparents for a Christmas gift.
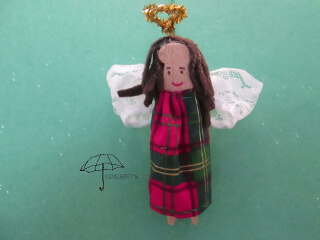
You will need;
- Christmas fabric
- 1 1/2 inch lace
- Felt
- Sparkly gold Chenille stems (pipe cleaner)
- Permanent markers
- 3 3/4 inch wooden no roll clothespin
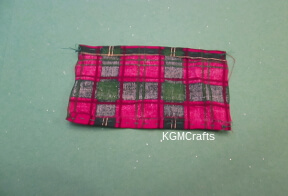
Cut a piece of Christmas fabric 4 by 3 inches. Fold the raw edges on the top and bottom of the fabric to the inside. With sewing thread, sew the sides down.
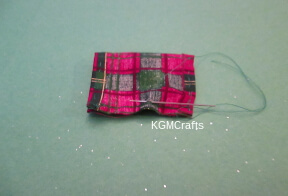
Stitch the short sides together.
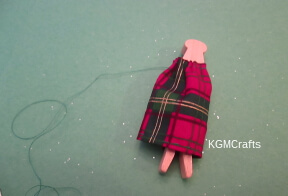
On the outside, sew a long running stitch. Place the fabric on the wooden clothespin. Pull the thread tight so that it fit just below the large circle on the clothespin.
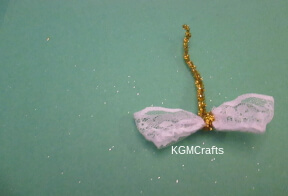
Cut a piece of lace 6 inches long. Fold the cut ends to the center. With a 6-inch pipe cleaner twist one end over the center of the lace.
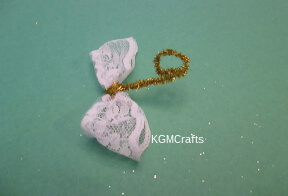
On the other end of the wire, make a circle for a halo. Folded it around the tip of your finger.
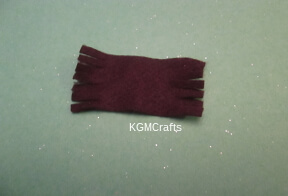
Cut a 1 by 3 inch piece of felt. Cut slits in the 1-inch side. Turn the piece over and cut slits on the other side. Don’t make the slits too long, maybe a 1 inch or so.
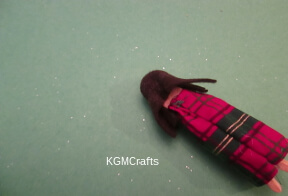
With hot glue, glue the felt to the clothespin for hair.
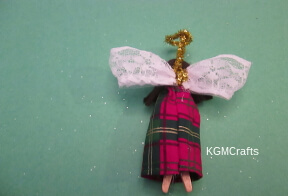
Glue the wings to the back of the angel. With a needle and craft string, make a hanger by making a stitch in the wing and tying the string in a knot.
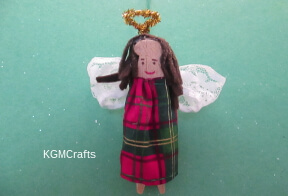
Add a face.
In art, angels often had halos over their heads to show their importance.
According to the movie “It’s a Wonderful Life” An angel gets its wings after a bell rings.
Beaded Angel
This one will look nice hanging on your Christmas tree.
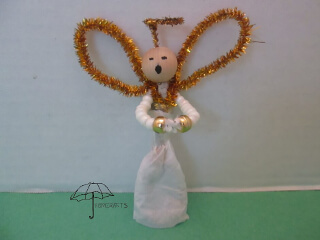
Materials;
- 3 White pipe cleaners
- 3 Gold Chenille stems (pipe cleaners)
- Wooded bead
- Sixteen small white pony beads
- Two bigger gold pony beads
- Twelve silver pony beads
- One long slender bead (any color)
- Black maker
- White tissue paper
- Tape
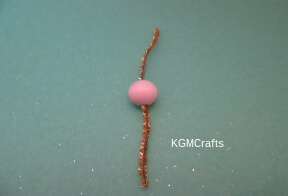
Place a wooded bead on a 6-inch gold Chenille stem. You will want 3 inches above the bead.
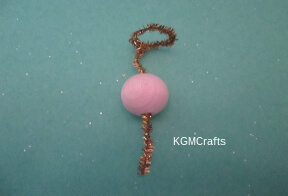
Twist the pipe cleaner that is above the bead into a circle for the halo. Trim off about 1/2 inch below the bead from the Chenille stem.
To make the legs;
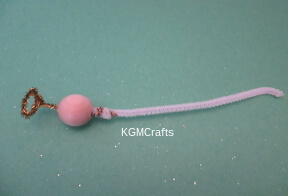
Twist an end of a 6-inch piece of white pipe cleaner in the center of the gold Chenille stem below the bead.
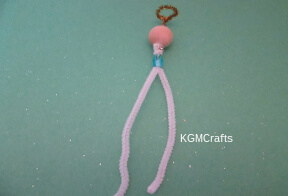
Thread the slender bead on one of the ends of the white pipe cleaner. Cut another 6 inch white pipe cleaner and thread it on the slender bead. Twist to make a neck.
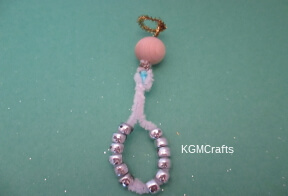
Place six large silver pony beads on the two 6 inch pieces. These will be the legs. When you have threaded the beads, twist the bottom ends together.
Make the arms;
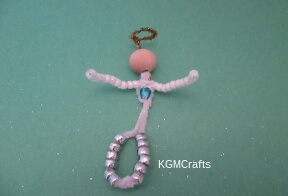
Twist another 6 inch piece of white pipe cleaner around the neck. Thread with eight small white pony beads on each end. On the ends place a larger gold bead. Twist the ends together.
Finish the angel
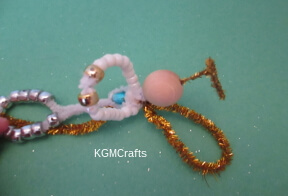
Thread a 12-inch gold Chenille stem in the slender bead. Fold it in an oval for the wings.
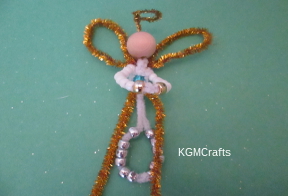
With the leftover end of the Chenille stem, twist around the back of the
neck and one of the arms. Do the same with another 12 inch piece of gold
Chenille stem.
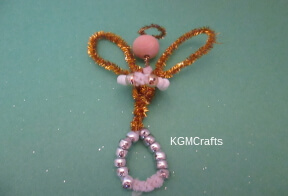
There will be two ends below the bead, twist each end around a leg.
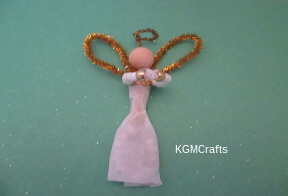
Cut 3 1/2 by 3 inches of white tissue paper and tape over the legs so that it makes a skirt.
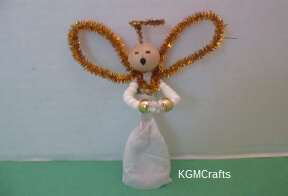
Make a face on the wooden bead with the black marker. I make two lines for closed eyes and a circle for a singing mouth.
If you want, you could also tie a piece of fishing wire between the wings so that you can hang the angel on a tree.
"The first Noel, the angel did say."
“Do not neglect to show hospitality to strangers, for thereby some have entertained angels unawares.” Hebrews 13:2 ESV
Decorate your house with a Christmas angel crafts theme this year.
