Hive Friendly Bee Crafts for Kids
by Karen & Grace Morris
Let's start buzzing around. Bee crafts for kids are queen approved. As a parent, this is reassuring. Your children can make puzzles, sun catchers and other decorations, your hive, um, your home will be filled with cute bees. Don't worry, there are no stingers attached.
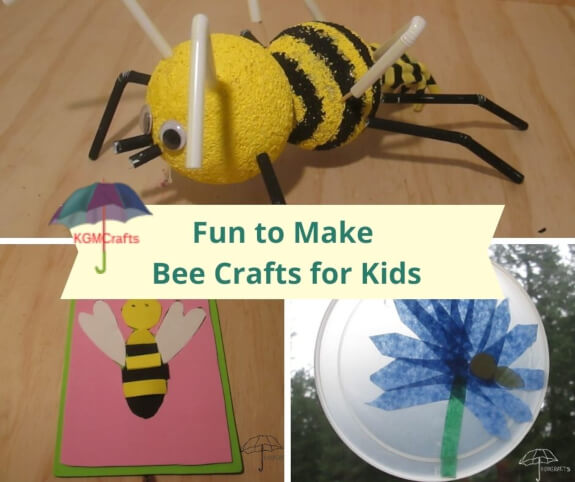
The pictures below will take you to the individual bee crafts for kids on this page.
Buzz, Buzz
Says the Bee
Show Me the Flowers
and
I Will Make You Some
Honey
While You Make Some Bee Crafts for Kids
The Squishy Bee

You will need;
- Three cotton balls (triple size)
- Small pieces of yellow tissue paper
- Black Maker
- Black paper
- Wiggly eyes
- Gold pompom
- Black and white pipe cleaners
- White glue
- Tacky glue
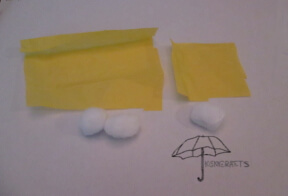
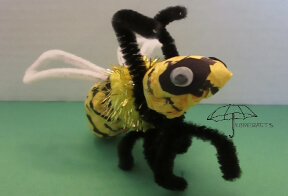
Cut one of the cotton balls into half (discard the other piece. You will only need one half). It will be the bee’s head. Take two whole cotton balls for the back part of the bee.
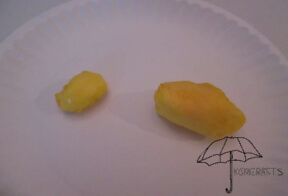
Squish the cotton for the head, cover it with yellow tissue paper and glue.
Do the same with the two cotton pieces for the back. Cover them with tissue and glue.
Dry both the head and the back of the bee overnight.
Did you know that some bees make honey out of nectar and they store it in a honeycomb?

The next day, take both the head and back and add stripes with a black marker.
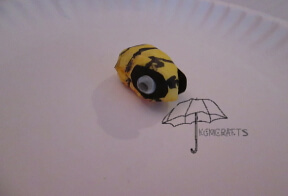
Now to finish the head, you will need to make two ovals out of black paper, and glue to the sides of the head. Glue on wiggly eyes on the black ovals.

Cut two pieces of black pipe cleaner, each 2 1/2 inches. With tacky glue, glue on the back of the head.
With tacky glue, glue the head to one side of a pompom. Glue the back to the other side of the pompom. Let the bee sit overnight. It may not look much like a bee, but after tomorrow you will see the resemblance.
Bees have hair on their legs that help them collect pollen.
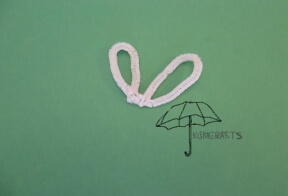
The next day, twist a 10-inch white pipe cleaner so that it looks like a pair of wings.
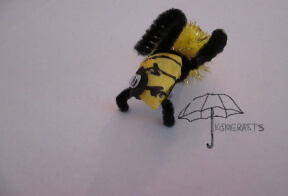
Cut three 6 inch pieces of black pipe cleaner.
Twist one piece on near the antennas; twist it so that it has two legs.
Take another piece of your pipe cleaner, twist it to the part of your bee’s back next to the sparkly pompom. You also want to make sure you have two more legs.
In the movie “Bee Movie”, a bee named Barry B. Benson sues the human race for stealing honey.
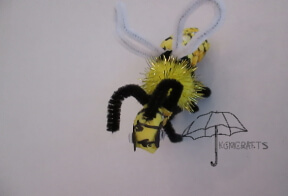
The last piece of pipe cleaner will hold the wings. So twist the black pipe cleaner around them and twist it around the bee. You should have six legs.
You will want to blend the middle legs up a bit, so your legs aren’t too close together. Now your bee should stand.
The Puzzled Bee Craft for Kids
Puzzled, puzzled. Where is the hive? Let's make a bee and find out where it hides.
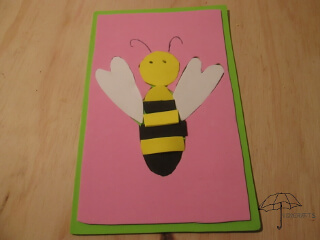
You will need;
- Craft foam in 2 background colors (You can use almost any color of craft foam you like. Some good choices are flower colors. Ex. Pink and green, which are both colors we have chosen. Using black or yellow as background colors wouldn't work well for this craft, as the bee would blend into the background.)
- Black, yellow, and white craft foam
- PDF template download here
- Black pen or marker
- Scissors
- Tacky glue
Make sure that the craft foam is all the same thickness.
Mark and trim 1/4 inch from the sides, top, and bottom of the pink piece of craft foam.
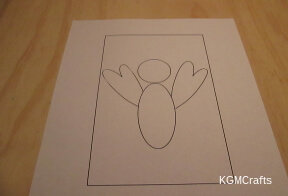
Download and print the FREE PDF.
Cut the head, wings, and body from the paper pattern.
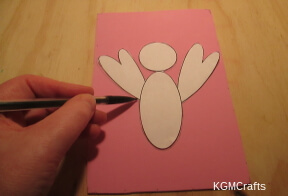
Cut the bee out, but leave the pieces whole. Place in the center of the pink craft foam and draw around outside.
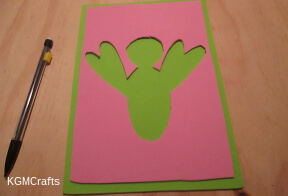
Cut around the lines on the foam, be careful not to cut the sides of the background.
Glue the pink craft foam to the green piece, making the base for the puzzle.
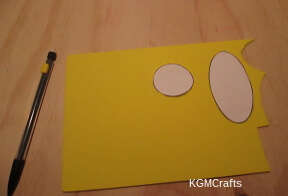
Cut the head and body from yellow craft foam.
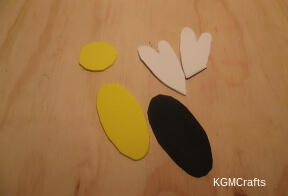
Cut the wings from white foam. Also, cut another body from the black.
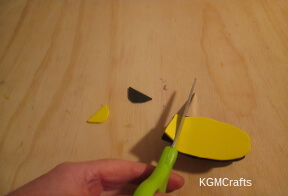
Hold the two oval pieces together and cut out strips.
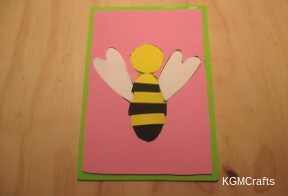
The top will be yellow, then add a black piece, then a yellow, finish the body with a black piece.
Place the pieces in the puzzle.
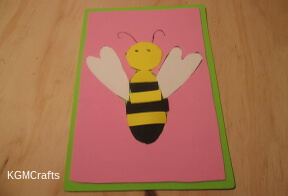
With a black pen, draw eyes on the yellow circle and antenna on the pink piece.
Big Honey Bee
Buzz, Buzz! This large bee is going to make some honey, honey! Here is one of the largest bee crafts for kids :)

What you need;
- 2 Styrofoam balls
- Yellow and black acrylic paint
- Paintbrush
- 26 toothpicks
- 14 yellow flexible straws
- 6 black flexible straws (If you don't have any on hand, you could paint the straws black.)
- 2 Wiggly eyes
- Tacky glue
- Tape
- Newspaper
- 2 paper plates
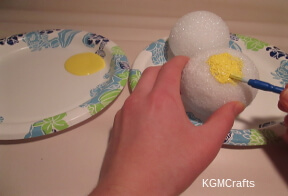
Cover your work space with newspaper. Also, take two paper plates. On one of the paper plate pour some yellow paint. Put your Styrofoam balls on the other.

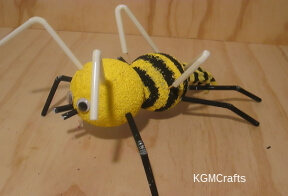
Take one of your Styrofoam balls and paint it yellow, leaving one end white. Paint the other Styrofoam ball completely yellow. Let dry.

With the paper plate that you were using as your pallet, pour on some black paint.
Take the Styrofoam ball with the white end and paint that end black. With the other yellow Styrofoam ball, paint on black stripes.

If you were unable to get black straws, take six straws and paint them. Let everything dry.

Take ten of your yellow straws and cut them about 3 inches long.

On one end of the striped Styrofoam ball place, ten toothpicks close together. You will want the toothpicks to be two rows of five each.
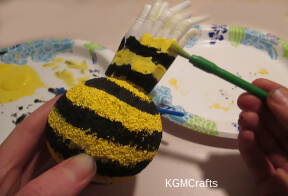
Stick your ten 3-inch straws on the toothpicks. Bend the flexible side downwards. Tape them together so they won't fall off. Paint black and yellow stripes on them, then let dry.
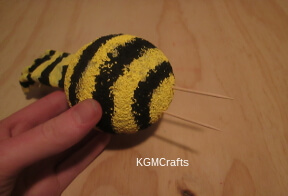
When everything is dry, stick two toothpicks on the other end of the stripe Styrofoam ball. Use the toothpicks to attach the other ball.

You want the black circle next to the stripes.

Take two yellow straws and cut them 5 inches each.

In an angle on one of the upper sides of the striped Styrofoam ball, stick in a toothpick. Put one of your 5-inch straws and bend it in a “V” shape. Stick in another toothpick where the end of the “V” is.
Put that end of the straw on the toothpick. Make a pair of wings by doing the same to the other 5-inch straw.
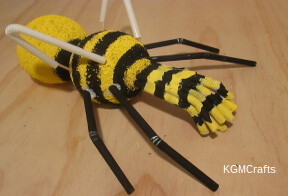
Take two of your black straws and cut them 4 3/4 inches long.
Near the end with the ten straws, stick in a toothpick at an angle on one side. Put on one of your 4 3/4 inch straws on the toothpick, blend slightly to make a leg.
Do the same with the other 4 3/4 inch straw to make a pair of back legs.
Cut two black straws so both of them measuring 4 inches long. Following the instructions above, place them near the two black straws you just put on.
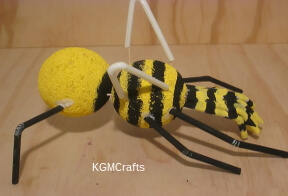
Take your other two black straws and cut them 3 3/4 inches long.
On your mostly yellow Styrofoam ball, stick in a toothpick on the side near the front end at an angle. Put one of your black straws on it, blend slightly to make a front leg.
Do the same with the other 3 3/4 inch straw to make a pair of front legs.
Adjust the bee's legs, so he is standing the way you want him. Carefully, without moving the legs any, use tacky glue around the bases of the straws that are touching the Styrofoam balls. The glue will drip and you might need to readjust the straws, so the bee won't collapse.
Once your bee is standing right, don't touch it. Leave it overnight to dry. Even though some glue has dripped, it should have dried good enough, so the straws don't fall off. This should allow your bee to stand up.

Take your last two yellow straws and cut them to be 4 1/2 inches each. Blend them so they look like an antenna.
Stick in two toothpicks on the top of the forth Styrofoam ball. Put your straws on them, using tacky glue around the bases to secure.
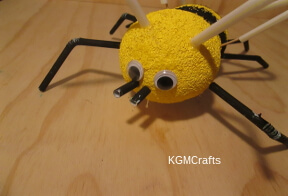
Stick in two toothpicks on the top of the forth Styrofoam ball. Put your straws on them, using tacky glue around the bases to secure.
With your leftover black straws, cut two pieces that are each 3/4 inches long.
With your last two toothpicks, stick them in the front of your bee near each other. You will want only a small bit of the toothpicks showing. Put your two black straws on them, gluing with tacky glue.
Glue on two wiggly eyes above the two small black straws. Let dry.
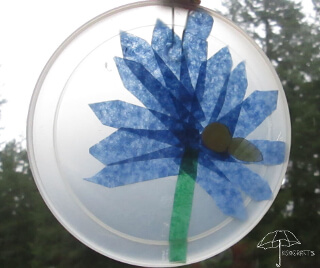
Sun Catcher Bee
Look, the flower "caught" the bee! Flowers and bees just go together. This bee craft for kids is sure to please.
Supplies;
- Clear plastic lid
- Scraps of blue and green tissue paper
- White paper
- Yellow washable paint
- Black pen
- Scissors
- Glue stick

Place a small amount of yellow paint in the paint's lid. Dip the tip of your finger in the yellow paint to make a small circle.
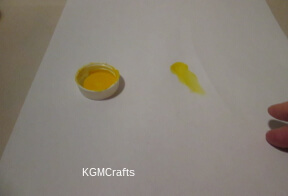
Bring your finger down to make the bee's body. You will want your child to make several bees so that you can pick the best one for the sun catcher.
While your paint is drying, cut strips of blue tissue (you don't need to use blue, any flower color will do) 2 1/4 by 1/2 inches. Cut a point on one end of each of the strips.
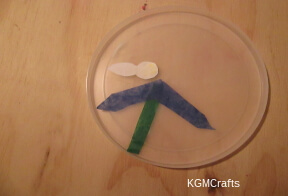
Cut one strip from green tissue, 2 1/2 by 1/4 inches.
When your bee is dry, draw black lines with your pen on the body.
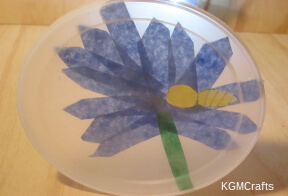
Glue the green stem to the inside of the lid. Glue a blue strip to each side of the green stem.
Cut the bee out. Glue it so that it is facing down. You want to see the yellow paint and black lines through the lid on the outside.
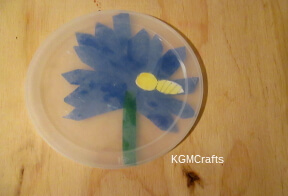
Continue placing the blue flower petals around the stem to make a flower.
Hang your sun catcher in the window, so you can see the bee on the flower.
Soon your hive, um, your home will be buzzing with laughter from the satisfying work of making bee crafts for kids.
